In the whirlwind of daily life, finding time to whip up healthy meals can seem impossible.
Luckily, Whole 30 recipes provide not just a reset for healthy living, but also a delicious way to nourish your family with clean, compliant meals that pack a flavor punch.
These recipes are inspired by the Paleo diet, making them not only convenient for busy families but also easily adaptable for meal prep.
Let’s explore these vibrant dishes that will not only tantalize your taste buds but also support your health goals.
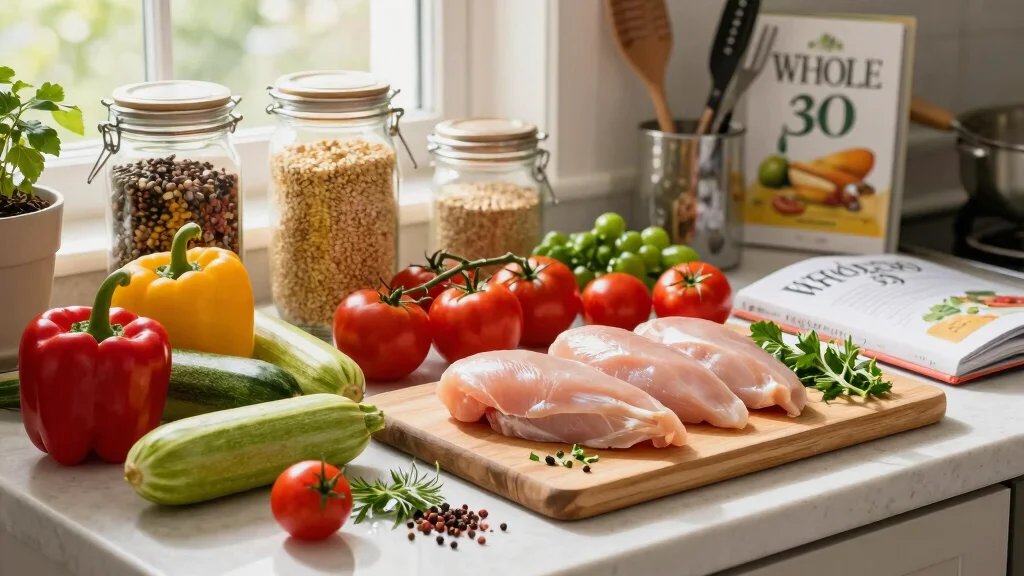
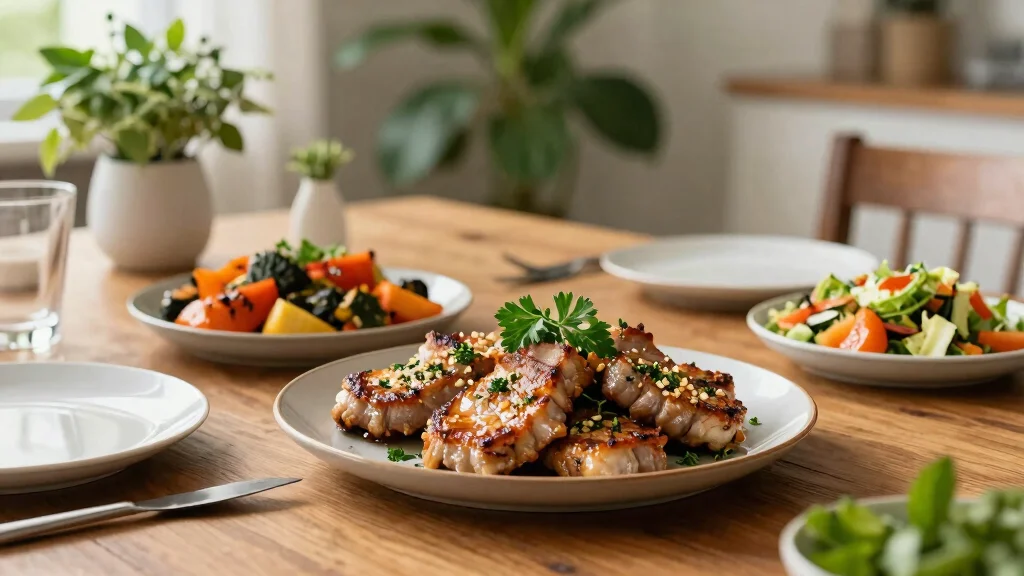
1. Zesty Lemon Herb Chicken

Brighten up your dinner table with this Zesty Lemon Herb Chicken, featuring a mouthwatering marinade that combines fresh lemon, garlic, and a mix of herbs. Perfectly grilled or baked, this chicken will be a hit with the family while being totally compliant with your Whole 30 lifestyle. It’s juicy, tender, and bursting with flavor, making it a fantastic stand-alone dish or a base for a hearty salad.
For the marinade, using a high-quality olive oil like Pompeian smooth extra virgin olive oil can make a significant difference in flavor and quality. This oil is rich in polyphenols and ideal for enhancing the taste of your chicken.
Recipe Overview:
– Servings: 4
– Prep Time: 15 minutes
– Cook Time: 25 minutes
– Total Time: 40 minutes
– Calories: Approximately 320 per serving
Nutrition Information:
– Protein: 42g
– Carbohydrates: 5g
– Fat: 15g
Ingredients:
– 4 boneless, skinless chicken breasts
– 1/4 cup olive oil
– Juice of 2 lemons
– 4 cloves garlic, minced
– 1 tablespoon fresh parsley, chopped
– 1 tablespoon fresh thyme, chopped
– Salt and pepper to taste
Step-by-Step Instructions:
1. In a bowl, mix olive oil, lemon juice, garlic, parsley, thyme, salt, and pepper.
2. Place chicken in a resealable bag and pour marinade over. Seal and marinate for at least 30 minutes, preferably overnight.
3. Preheat grill or oven to 375°F (190°C).
4. Remove chicken from marinade and grill or bake for 20-25 minutes or until internal temperature reaches 165°F (74°C). For ensuring perfect doneness, consider using a digital meat thermometer. This tool provides an instant read of the internal temperature, allowing you to avoid overcooking and keeping the chicken juicy.
5. Let rest for 5 minutes before serving.
For best results: Marinating overnight will yield more flavorful results.
FAQs: Can I use bone-in chicken? Sure! Just adjust cooking time accordingly. If you prefer a quicker option, you could also try using an herb and garlic marinade mix, which simplifies the process while still delivering great flavor.
Recommended Products

Save Time and Money – Whether you want to save time and money or just prefer home cooking over fast food, PrepNaturals glass food storage containers set is perfect for you. Durable and easy to use, these glass containers encourage you to cook at home and eat healthier food.

【Practical & Healthy】 These food storage containers are made of BPA-free PP material, ensuring that they are safe for your family to use safe for storing food. The 48oz size of these plastic food containers is perfect for portion control, keep your food fresh and make meal prep a breeze, with our quick.

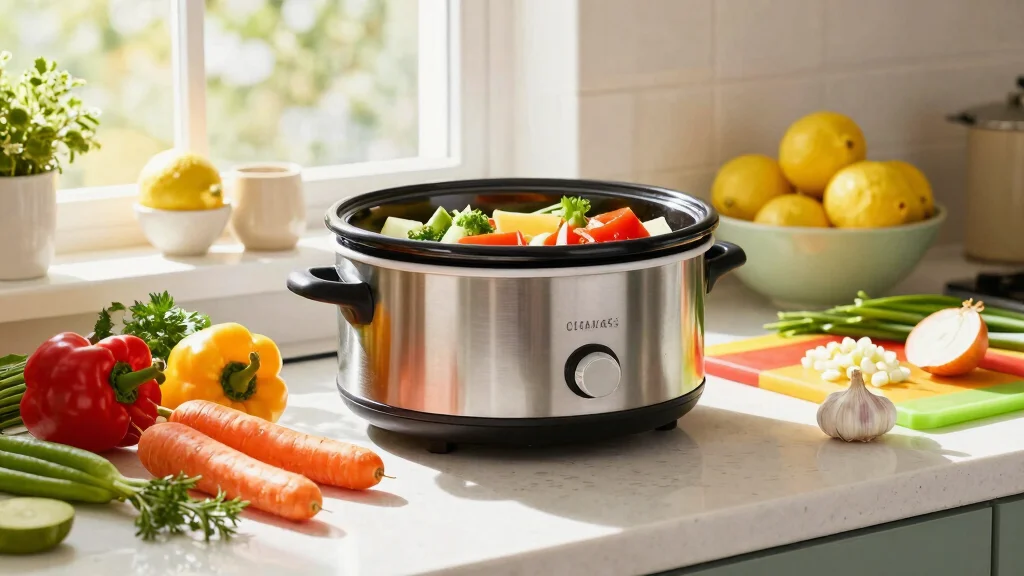
2. Creamy Coconut Curried Vegetables
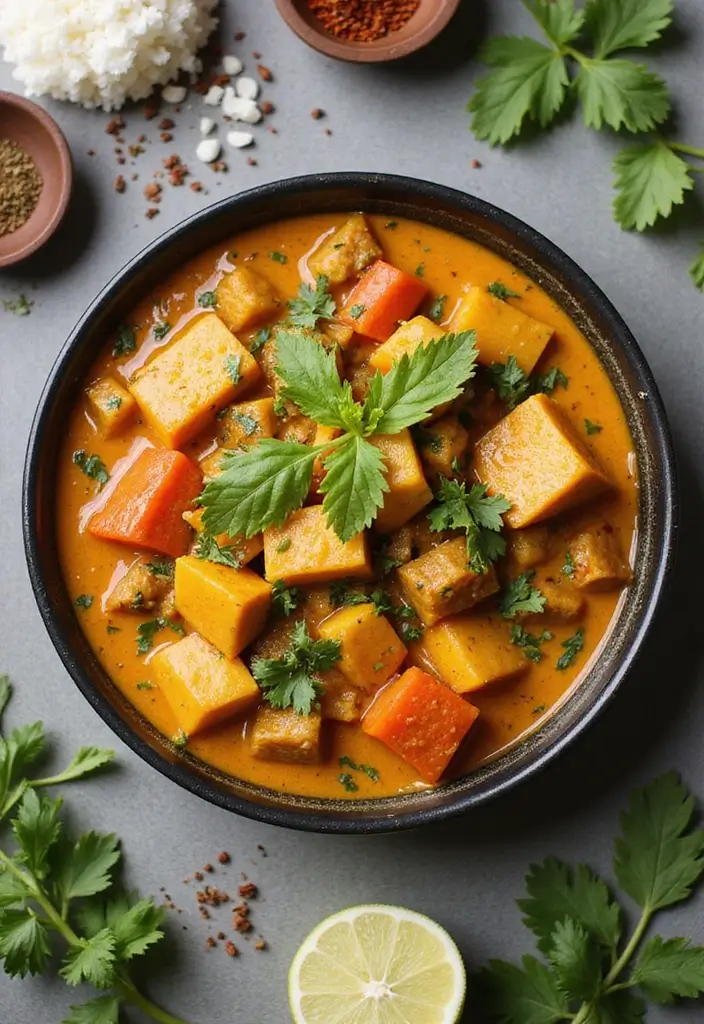
Transform your veggies into a comforting dish with these Creamy Coconut Curried Vegetables.
This recipe combines a variety of seasonal vegetables simmered in a rich coconut milk curry, giving you a hearty meal that’s bursting with flavor. It’s simple to whip up, and perfect for batch cooking or enjoying fresh. Whether served over cauliflower rice or enjoyed on its own, this dish is sure to delight.
For the creamy base, using Thai Kitchen gluten free unsweetened coconut milk will provide the rich texture and taste you need without any added sugars.
Recipe Overview:
– Servings: 6
– Prep Time: 10 minutes
– Cook Time: 20 minutes
– Total Time: 30 minutes
– Calories: Approximately 200 per serving
Nutrition Information:
– Protein: 5g
– Carbohydrates: 12g
– Fat: 15g
Ingredients:
– 1 can coconut milk
– 2 cups mixed vegetables (carrots, bell peppers, zucchini)
– 1 tablespoon curry powder
– 1 teaspoon ginger, grated
– 2 tablespoons olive oil
– Salt to taste
Step-by-Step Instructions:
1. Heat olive oil in a large skillet. A large skillet is perfect for this recipe, allowing plenty of space for your vegetables to sauté properly.
2. Add ginger and curry powder, cooking for 1 minute until fragrant. For the spice blend, consider using Amazon brand happy belly curry powder to add a warm, aromatic flavor.
3. Toss in mixed vegetables, sautéing for about 5 minutes.
4. Pour in coconut milk and simmer for 15 minutes, stirring occasionally.
5. Season with salt and serve hot.
You can add protein such as chicken or shrimp for added nutrition.
FAQs: Can I use different vegetables? Absolutely! Use whatever you have on hand.
Recommended Products

33.8 fl oz of premium Mediterranean extra virgin olive oil

SMOOTH EXTRA VIRGIN OLIVE OIL BULK SIZE: Expertly crafted by The Olive Oil People using first cold pressed olives, Smooth EVOO with naturally occurring polyphenols
![Allergy-Free and Easy Cooking: 30-Minute Meals without Gluten, Wheat, Dairy, Eggs, Soy, Peanuts, Tree Nuts, Fish, Shellfish, and Sesame [A Cookbook]](https://m.media-amazon.com/images/I/51xMwzVr62L._SL500_.jpg)


3. Spaghetti Squash with Meat Sauce
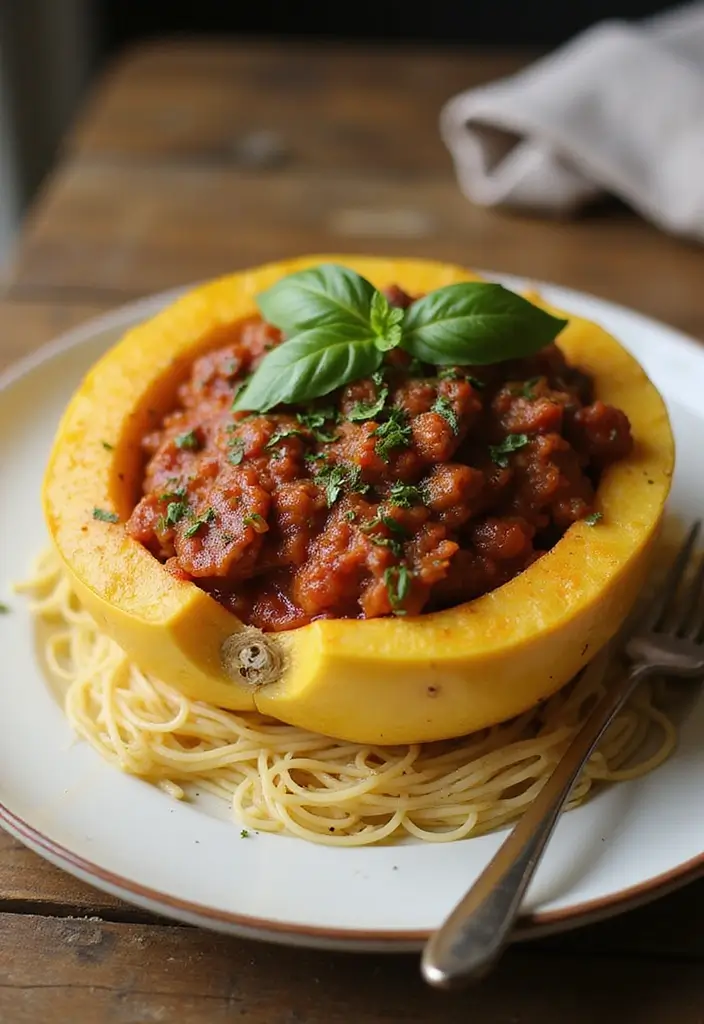
Replace traditional pasta with this nutritious Spaghetti Squash with Meat Sauce. The spaghetti squash gives you that pasta-like experience, while the rich meat sauce, enhanced by Pompeian Smooth Extra Virgin Olive Oil and McCormick Italian Seasoning, packs a punch of protein and flavors. This comforting dish is perfect for busy weeknights and is sure to be a family favorite.
Serve it with a sprinkle of fresh basil for that extra touch.
Recipe Overview:
– Servings: 4
– Prep Time: 10 minutes
– Cook Time: 45 minutes
– Total Time: 55 minutes
– Calories: Approximately 350 per serving
Nutrition Information:
– Protein: 28g
– Carbohydrates: 10g
– Fat: 18g
Ingredients:
– 1 medium spaghetti squash, like Moonrise Organic Dried Spaghetti Squash
– 1 lb ground beef or turkey
– 1 can crushed tomatoes
– 1 onion, diced
– 3 cloves garlic, minced
– 2 tablespoons olive oil
– 1 teaspoon Italian seasoning
– Salt and pepper to taste
Step-by-Step Instructions:
1. Preheat oven to 400°F (200°C). Cut spaghetti squash in half and remove seeds.
2. Drizzle with olive oil, salt, and pepper. Place cut-side down on a baking sheet. Roast for 30-40 minutes.
3. In a skillet, heat olive oil over medium. Sauté onion and garlic until softened.
4. Add ground meat, cooking until browned. Drain excess fat.
5. Stir in crushed tomatoes and Italian seasoning. Let simmer for 10-15 minutes.
6. Once spaghetti squash is cooked, use a fork to scrape out the strands and serve with sauce on top.
Make extra meat sauce to freeze for later meals.
FAQs: Can I make this vegetarian? Yes, just swap the meat for lentils or mushrooms.
Swap out pasta for spaghetti squash, and you’ll not only save calories but also pack in nutrients! A comforting meat sauce makes this dish a family favorite for busy weeknights.
Recommended Products

Instant Read Food Thermometer | Our instant read thermometer features a temperature probe and advanced, highly accurate technology with 1-2 seconds response time; Instructions, meat temperature chart, comes pre-calibrated for your convenience, and recalibrating feature if needed.

【8X Faster + 4X More Precise】: Upgraded with an industrial-leading professional thermocouple sensor, Themomonster meat thermometer digital with NIST certified ±0.5℉ precision provides you the accurate temperature of your food in just 0.5 Seconds.

Fast and Accurate: 1 second response time! Meat thermometer digital features 3.9 inches food grade stainless steel probe and a high precision sensor which receives internal temp within seconds, accurate to ±0.9 degree Fahrenheit; Don’t spend any extra time leaning over a hot surface


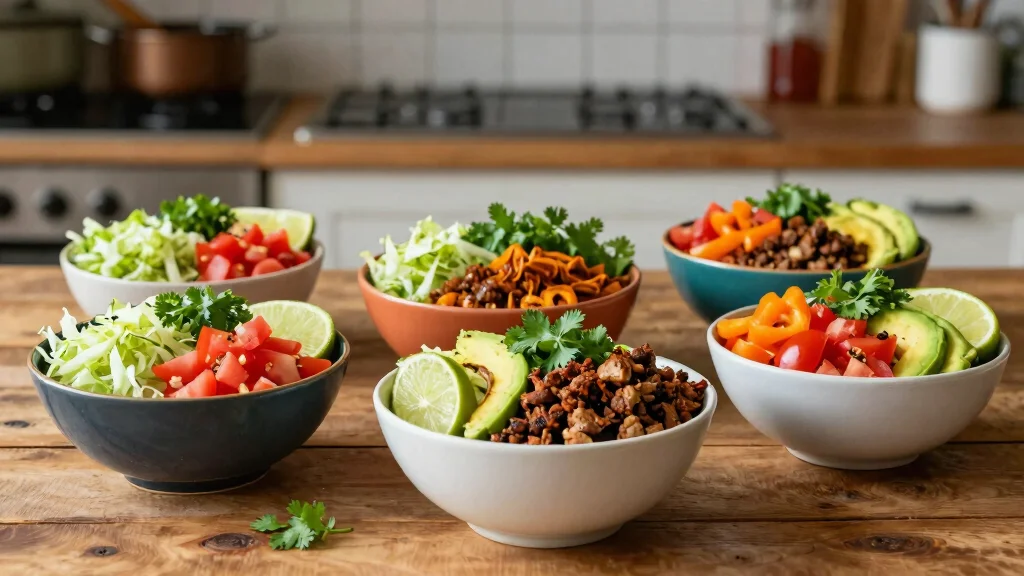
4. Grilled Shrimp Tacos with Mango Salsa
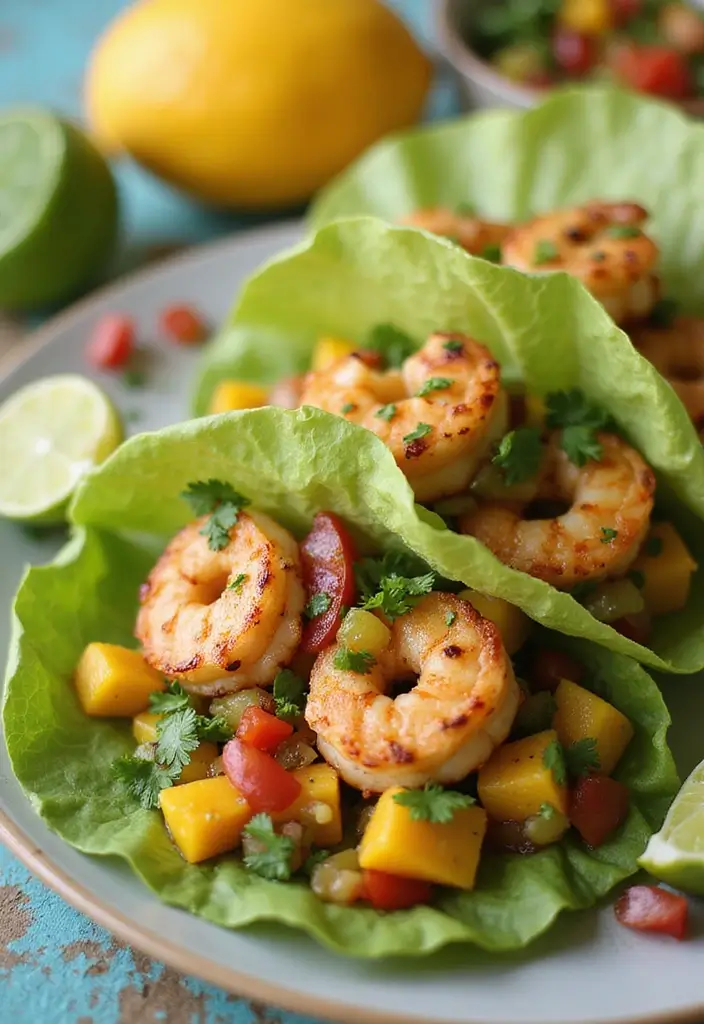
Bright, fresh, and fun, these Grilled Shrimp Tacos with Mango Salsa are a burst of flavor in every bite! The smoky shrimp combined with sweet and spicy mango salsa offers a perfect balance, making these tacos a hit during family gatherings or casual dinner nights. Plus, they are simple to prepare and perfect for a light meal.
To make the process even easier, consider using the shrimp peeler and deveiner tool. This handy gadget will save you time and effort when getting your shrimp ready for grilling.
Recipe Overview:
– Servings: 4
– Prep Time: 20 minutes
– Cook Time: 10 minutes
– Total Time: 30 minutes
– Calories: Approximately 250 per serving
Nutrition Information:
– Protein: 20g
– Carbohydrates: 10g
– Fat: 15g
Ingredients:
– 1 lb shrimp, peeled and deveined
– 1 tablespoon olive oil
– 1 teaspoon chili powder
– Salt and pepper to taste
– 1 mango, diced
– 1/2 red onion, diced
– 1 jalapeño, minced
– Juice of 1 lime
– Lettuce leaves for serving
Step-by-Step Instructions:
1. In a bowl, combine shrimp with olive oil, chili powder, salt, and pepper.
2. Heat grill or grill pan over medium-high heat. Grill shrimp for 2-3 minutes on each side until pink and opaque. For this, a grill pan is perfect, allowing you to achieve that ideal char and flavor without fuss.
3. In a separate bowl, combine mango, red onion, jalapeño, lime juice, and season with salt.
4. To serve, place grilled shrimp in lettuce leaves and top with mango salsa.
For added flavor, marinate the shrimp for 30 minutes before grilling, and don’t forget to grab some olive oil spray to help prevent sticking on your grill pan.
FAQs: Can I use frozen shrimp? Yes, just thaw them before cooking.

5. Herb-Roasted Sweet Potatoes
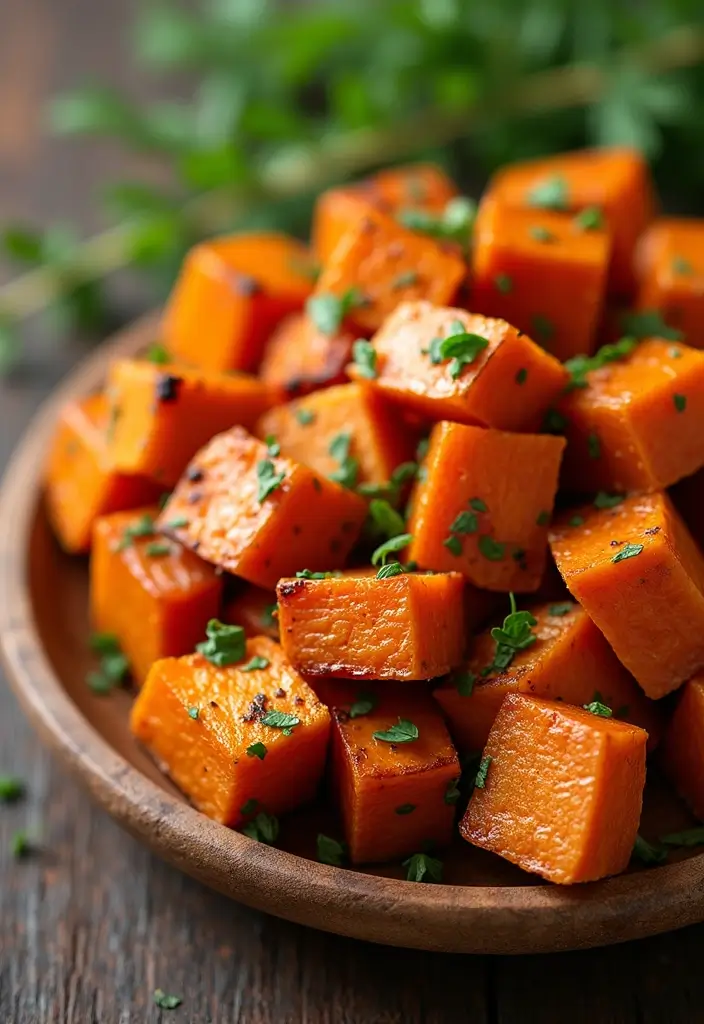
These Herb-Roasted Sweet Potatoes are the perfect side dish!
With a crispy exterior and a fluffy interior, they are packed with nutrients and flavor. Tossed in a blend of herbs and spices, they make a deliciously wholesome addition to any meal. Plus, they are easy to prep, making them great for meal prep! To help you store your delicious creations, consider using meal prep containers. These airtight glass containers are perfect for keeping your sweet potatoes fresh and ready to reheat for meals throughout the week.
Recipe Overview:
– Servings: 4
– Prep Time: 10 minutes
– Cook Time: 30 minutes
– Total Time: 40 minutes
– Calories: Approximately 180 per serving
Nutrition Information:
– Protein: 3g
– Carbohydrates: 40g
– Fat: 1g
Ingredients:
– 2 large sweet potatoes, cubed
– 2 tablespoons olive oil
– 1 teaspoon garlic powder
– 1 teaspoon paprika
– Salt and pepper to taste
– Fresh rosemary, chopped (optional)
Step-by-Step Instructions:
1. Preheat oven to 425°F (220°C).
2. In a bowl, toss cubed sweet potatoes with olive oil, garlic powder, paprika, salt, and pepper. Using high-quality olive oil will enhance the flavor and ensure a nutritious base for your dish.
3. Spread evenly on a baking sheet and roast for 25-30 minutes, stirring halfway through.
4. If desired, sprinkle with fresh rosemary before serving.
To keep your spices organized and accessible while preparing this recipe, a herb and spice organizer can be a game-changer. With 28 spice jars and labels, you can easily find what you need to elevate your cooking.
You can make these sweet potatoes in advance and reheat for meals throughout the week.
FAQs: How can I store leftovers? They store well in an airtight container for up to 5 days.


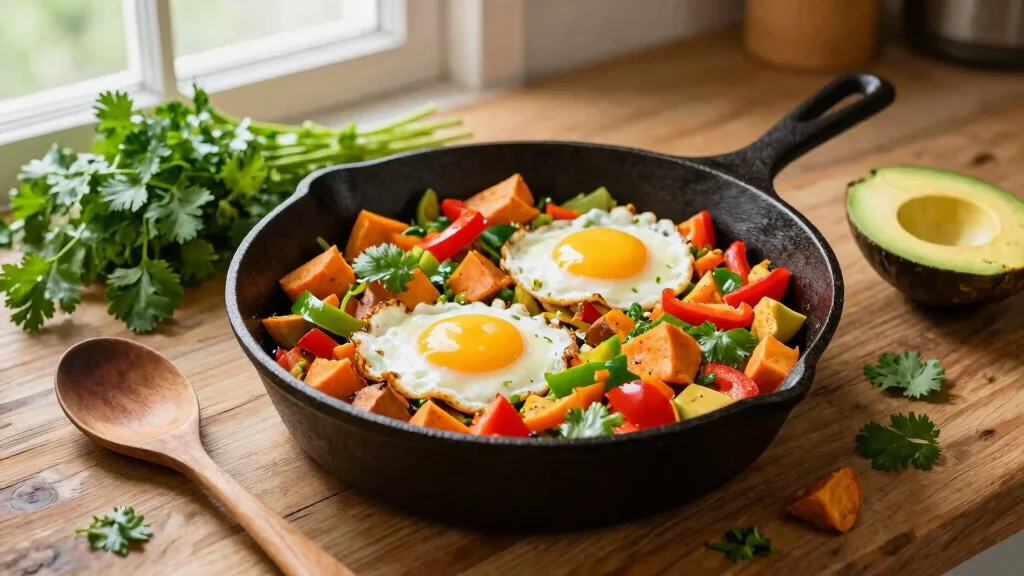
6. Breakfast Egg Muffins

Starting your day off right has never been easier with these Breakfast Egg Muffins! Packed with vegetables and protein, these muffins are not only tasty but also convenient for busy mornings. Just bake and go! They’re great for meal prep and can be customized with your favorite add-ins.
For making these muffins, consider using a silicone muffin pan. Its metal reinforced frame provides excellent support during baking, ensuring your muffins come out perfectly shaped every time. Plus, being BPA-free, it’s a healthier option for your kitchen.
Recipe Overview:
– Servings: 12
– Prep Time: 10 minutes
– Cook Time: 20 minutes
– Total Time: 30 minutes
– Calories: Approximately 100 per muffin
Nutrition Information:
– Protein: 7g
– Carbohydrates: 3g
– Fat: 6g
Ingredients:
– 8 large eggs
– 1 cup spinach, chopped
– 1/2 bell pepper, diced
– 1/2 cup onion, diced
– Salt and pepper to taste
– Olive oil spray for greasing
For greasing your pan, you’ll want to use a high-quality cooking spray like olive oil spray. This USDA certified organic option is free from propellants, ensuring a clean and compliant cooking surface for your muffins.
Step-by-Step Instructions:
1. Preheat oven to 350°F (175°C) and grease a muffin tin with olive oil spray.
2. In a bowl, whisk eggs, season with salt and pepper, and add vegetables.
3. Pour the mixture into muffin tins, filling each about 3/4 full.
4. Bake for 15-20 minutes or until the eggs are set.
5. Let cool before removing from the tin.
If you’re planning to make a batch for the week, you might find meal prep containers very useful. These airtight glass containers are perfect for storing your muffins, keeping them fresh and ready to grab for a quick breakfast.
Add cheese or meat for added protein if desired.
FAQs: Can I freeze these muffins? Yes, they freeze well and can be reheated!


7. Cauliflower Fried Rice
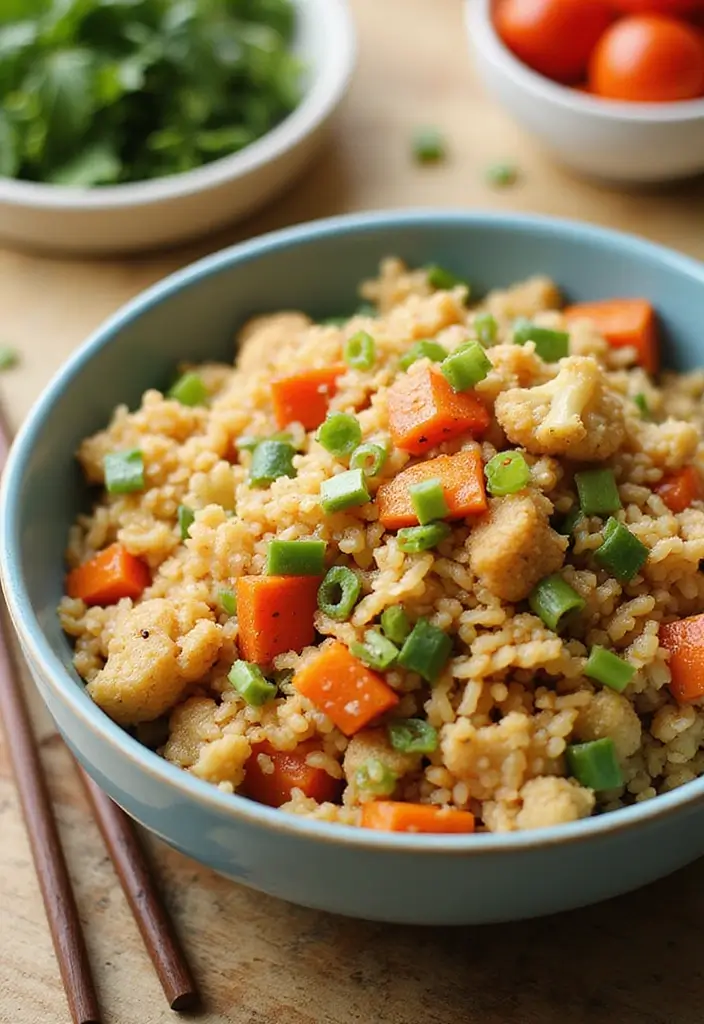
Enjoy a healthier twist on a classic dish with this Cauliflower Fried Rice. This recipe swaps out traditional rice for riced cauliflower, making it lower in carbs but still satisfying! Packed with vegetables and flavors, it’s perfect as a side dish or a main meal on its own.
For convenience, consider using 365 by Whole Foods Market, organic riced cauliflower. This ready-to-use product helps save time on prep, allowing you to dive right into cooking.
Recipe Overview:
– Servings: 4
– Prep Time: 10 minutes
– Cook Time: 10 minutes
– Total Time: 20 minutes
– Calories: Approximately 150 per serving
Nutrition Information:
– Protein: 4g
– Carbohydrates: 10g
– Fat: 8g
Ingredients:
– 1 medium head of cauliflower, riced
– 1 cup mixed vegetables (peas, carrots, bell peppers)
– 2 tablespoons Pompeian smooth extra virgin olive oil
– 3 cloves garlic, minced
– 2 eggs, beaten
– Salt and pepper to taste
Step-by-Step Instructions:
1. In a large skillet, heat olive oil over medium heat. Add garlic and sauté for 1 minute.
2. Add riced cauliflower and mixed vegetables, cooking for 5-7 minutes until tender.
3. Push the cauliflower to one side of the skillet and pour beaten eggs on the other side. Scramble until cooked through.
4. Mix well, season with salt and pepper, and serve hot.
Using a quality non-stick surface can make cooking and cleanup easier. A CAROTE nonstick frying pan skillet can help you perfectly cook the eggs without them sticking, ensuring a smooth cooking experience.
Experiment with different vegetables to suit your taste!
FAQs: Can I make this ahead of time? Yes, it stores well in the fridge for up to 3 days.
Swap traditional rice for riced cauliflower, and you’ve got a meal that’s not just lower in carbs, but packed with flavor! Healthy eating doesn’t have to be boring; let each bite inspire you!

8. Balsamic Glazed Brussels Sprouts
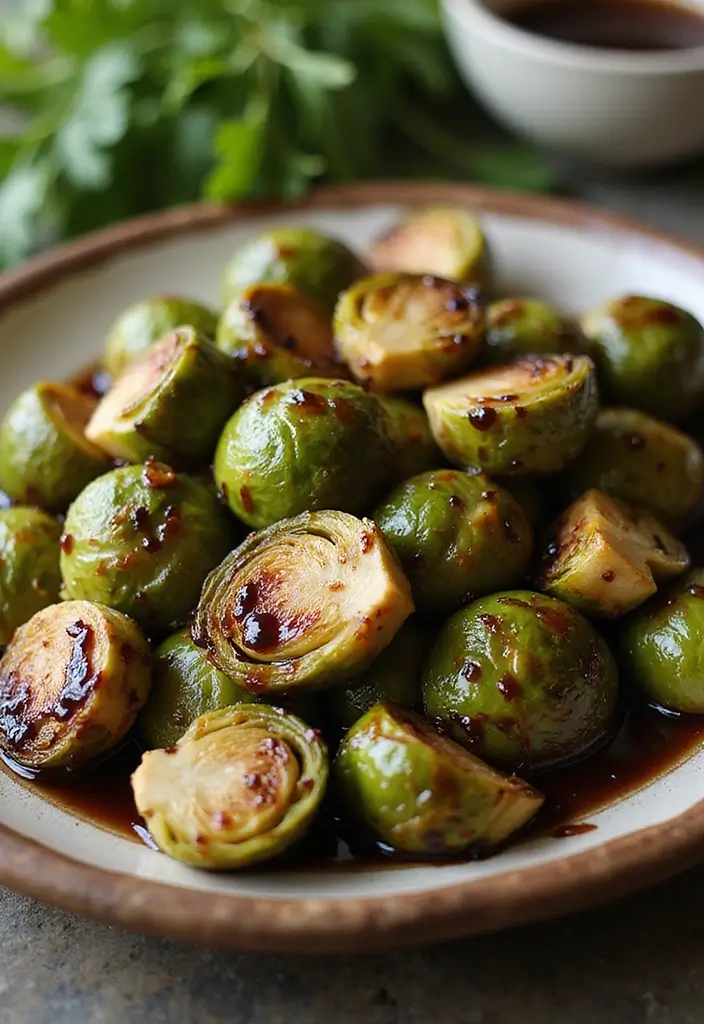
These Balsamic Glazed Brussels Sprouts are a delightful side that everyone will love! Roasted to perfection, the glaze adds a sweet and tangy flavor that makes these little veggies shine. They make for a delicious accompaniment to any main dish and are great for meal prepping too!
To achieve the best results, consider using high-quality ingredients like Pompeian smooth extra virgin olive oil. This oil not only enhances the flavor of the Brussels sprouts but also contains beneficial polyphenols that can contribute to your health.
For the glaze, a good balsamic vinegar is essential. I recommend 365 by Whole Foods Market organic balsamic vinegar of Modena, which adds a rich, tangy sweetness that complements the roasted sprouts perfectly.
Recipe Overview:
– Servings: 4
– Prep Time: 10 minutes
– Cook Time: 25 minutes
– Total Time: 35 minutes
– Calories: Approximately 150 per serving
Nutrition Information:
– Protein: 4g
– Carbohydrates: 28g
– Fat: 6g
Ingredients:
– 1 lb Brussels sprouts, trimmed and halved
– 2 tablespoons olive oil
– 1/4 cup balsamic vinegar
– Salt and pepper to taste
Step-by-Step Instructions:
1. Preheat oven to 400°F (200°C).
2. In a bowl, toss Brussels sprouts with olive oil, salt, and pepper.
3. Spread on a baking sheet, such as the GoodCook everyday nonstick carbon steel baking sheet set, and roast for 20-25 minutes until crispy.
4. Drizzle with balsamic vinegar and return to the oven for another 5 minutes.
5. Serve hot and enjoy!
For extra crunch, broil for the last few minutes.
FAQs: Can I use frozen Brussels sprouts? Fresh is better for texture, but frozen can work too.

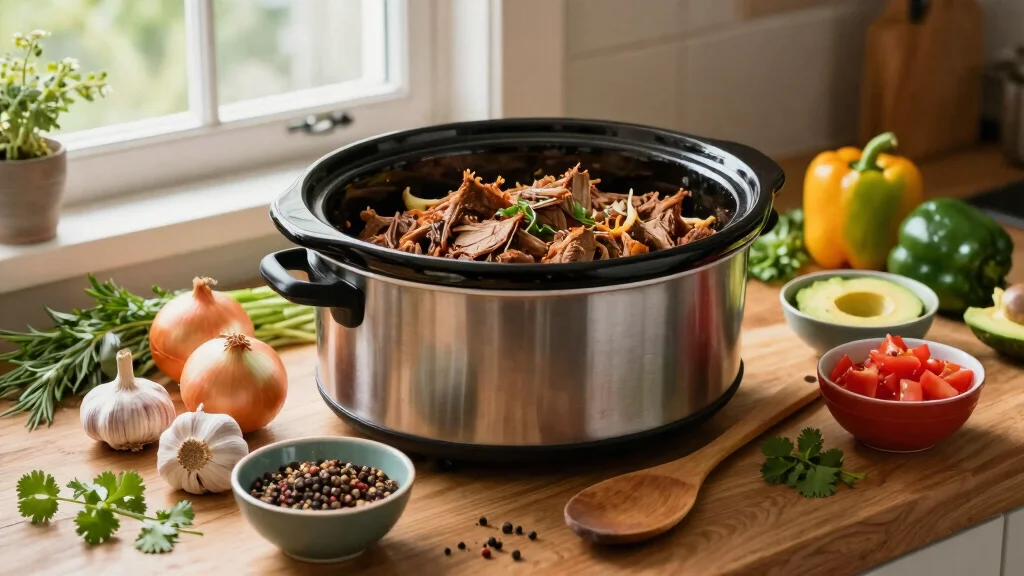
9. Whole 30 Chili
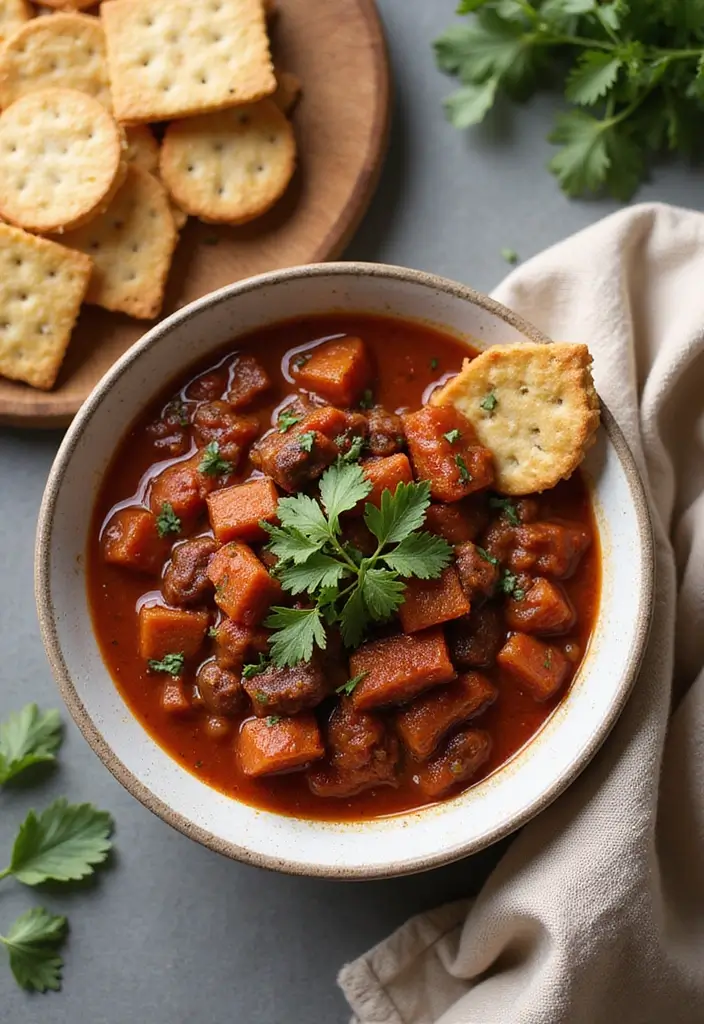
Warm up with a bowl of hearty and comforting Whole 30 Chili. This recipe is packed with protein from ground meat and is loaded with vegetables and spices to create a robust dish that nourishes the body and soul. It’s perfect for meal prep and can be made ahead to enjoy throughout the week. To make storing your chili easier, consider using glass meal prep containers with lids. These airtight containers are microwave, freezer, and dishwasher safe, ensuring your leftovers stay fresh and convenient for those busy days.
Recipe Overview:
– Servings: 6
– Prep Time: 15 minutes
– Cook Time: 45 minutes
– Total Time: 1 hour
– Calories: Approximately 400 per serving
Nutrition Information:
– Protein: 30g
– Carbohydrates: 15g
– Fat: 20g
Ingredients:
– 1 lb ground beef or turkey
– 1 can diced tomatoes
– 1 cup bell peppers, diced
– 1 onion, diced
– 2 cloves garlic, minced
– 2 tablespoons chili powder
– Salt to taste
Step-by-Step Instructions:
1. In a large pot, brown the ground meat over medium heat. Drain excess fat.
2. Add garlic, onion, and bell peppers, cooking until softened.
3. Stir in diced tomatoes, chili powder, and salt. Simmer for 30 minutes.
4. Serve hot and enjoy!
For an added touch of convenience, you might want to consider using an Instant Pot Duo 7-in-1 Electric Pressure Cooker. This handy appliance can expedite the cooking process, allowing you to make your chili even faster. Plus, it can also be used for a variety of other meal prep tasks, like sautéing and steaming.
Adjust spices to your preference for more heat!
FAQs: Can I freeze chili? Yes, it freezes well for up to 3 months.


10. Almond Flour Pancakes
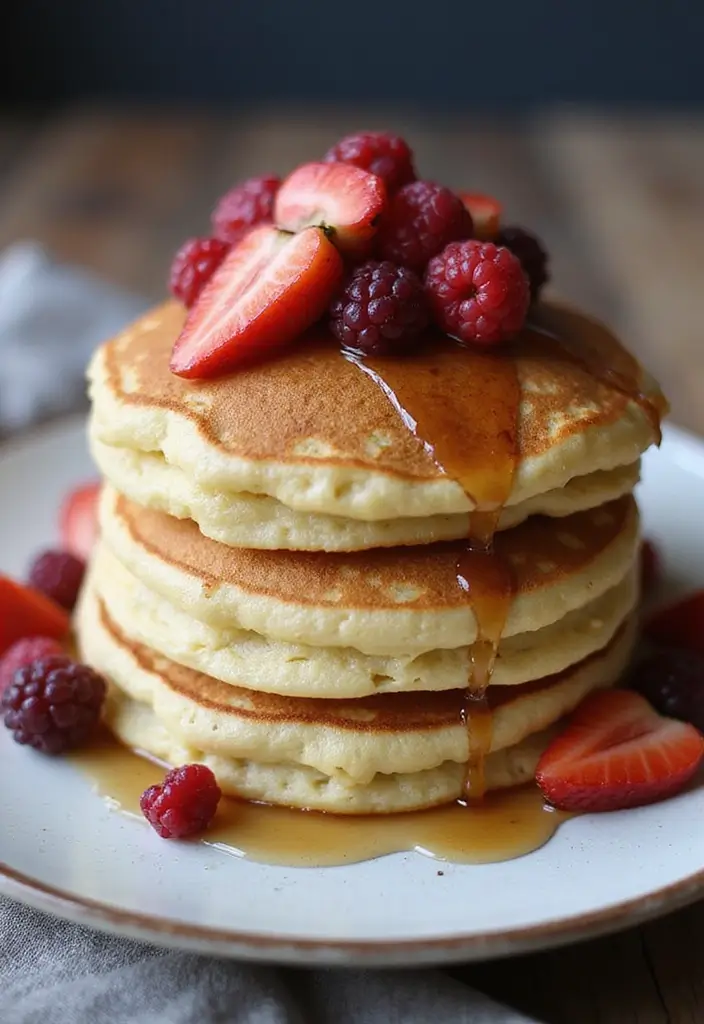
Enjoy a delicious breakfast or snack with these fluffy almond flour pancakes! Made without any grains, these pancakes are light and satisfying, perfect for a Whole 30 morning treat. To make your pancakes even better, you can use Blue Diamond Almonds almond flour, which is gluten-free and finely sifted, ensuring a smooth batter that results in perfectly fluffy pancakes. You can easily customize them with your favorite add-ins like blueberries or just enjoy them plain with some maple syrup.
Recipe Overview:
– Servings: 4
– Prep Time: 5 minutes
– Cook Time: 15 minutes
– Total Time: 20 minutes
– Calories: Approximately 250 per serving
Nutrition Information:
– Protein: 8g
– Carbohydrates: 10g
– Fat: 20g
Ingredients:
– 1 cup almond flour
– 2 large eggs
– 1/4 cup almond milk or coconut milk
– 1 tablespoon coconut oil, melted
– 1 teaspoon vanilla extract
– 1 teaspoon baking powder
– Pinch of salt
Step-by-Step Instructions:
1. In a bowl, whisk together almond flour, baking powder, and salt.
2. In another bowl, combine eggs, milk, coconut oil, and vanilla.
3. Mix wet ingredients into the dry ingredients until combined.
4. Heat a skillet over medium heat and add a little coconut oil. A non-stick skillet is great for cooking these pancakes, ensuring they won’t stick and flip easily.
5. Pour batter in small circles, cooking for about 2-3 minutes on each side until golden brown.
6. Serve with fresh fruit or syrup.
Add a little cinnamon for extra flavor.
FAQs: Can I use other flours? Stick to almond flour for Whole 30 compliance.


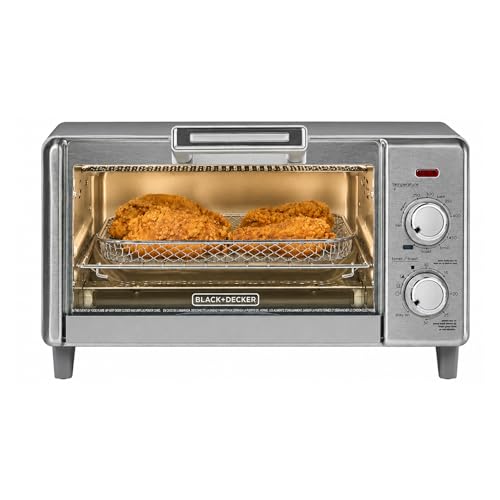
11. Spicy Roasted Chickpeas
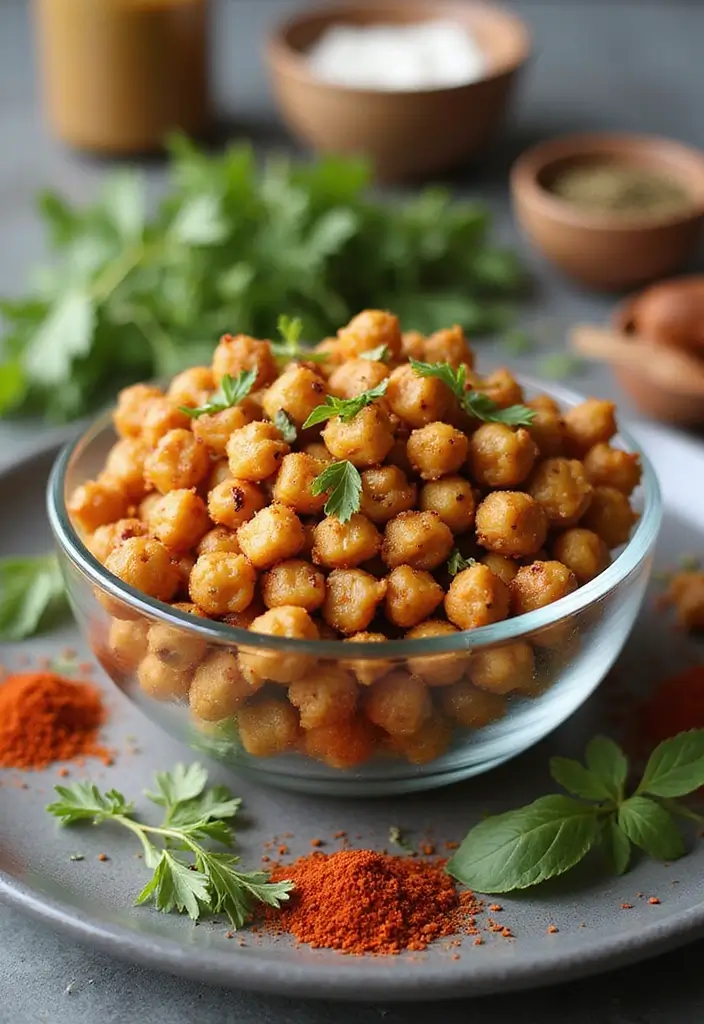
Snack without guilt with these Spicy Roasted Chickpeas! Crispy and full of flavor, these little bites are a fantastic alternative to chips or crackers. Perfect for munching on during the day, they provide a punch of protein and fiber, keeping you full longer.
For your convenience in preparing and storing these delicious snacks, consider using an air fryer. It allows for faster cooking with less oil, making them even crispier while retaining that satisfying crunch.
Recipe Overview:
– Servings: 4
– Prep Time: 10 minutes
– Cook Time: 30 minutes
– Total Time: 40 minutes
– Calories: Approximately 200 per serving
Nutrition Information:
– Protein: 9g
– Carbohydrates: 28g
– Fat: 3g
Ingredients:
– 1 can chickpeas, rinsed and drained
– 2 tablespoons olive oil
– 1 teaspoon paprika
– 1/2 teaspoon cayenne pepper
– Salt to taste
Step-by-Step Instructions:
1. Preheat oven to 400°F (200°C) or set your air fryer to cook.
2. Pat chickpeas dry with a paper towel.
3. In a bowl, toss with olive oil, paprika, cayenne, and salt.
4. Spread on a baking sheet in a single layer or place in the air fryer basket and cook until crispy. If using the oven, roast for 25-30 minutes, stirring every 10 minutes. For the air fryer, check for crispness around the same time.
5. Let cool before serving.
Store your roasted chickpeas in glass food storage containers with airtight lids to keep them crunchy. These containers are perfect for meal prep, whether you’re making snacks for the week or storing leftovers.
FAQs: Can I add other spices? Yes, get creative with your favorite seasonings!


12. Lemon Garlic Shrimp with Asparagus
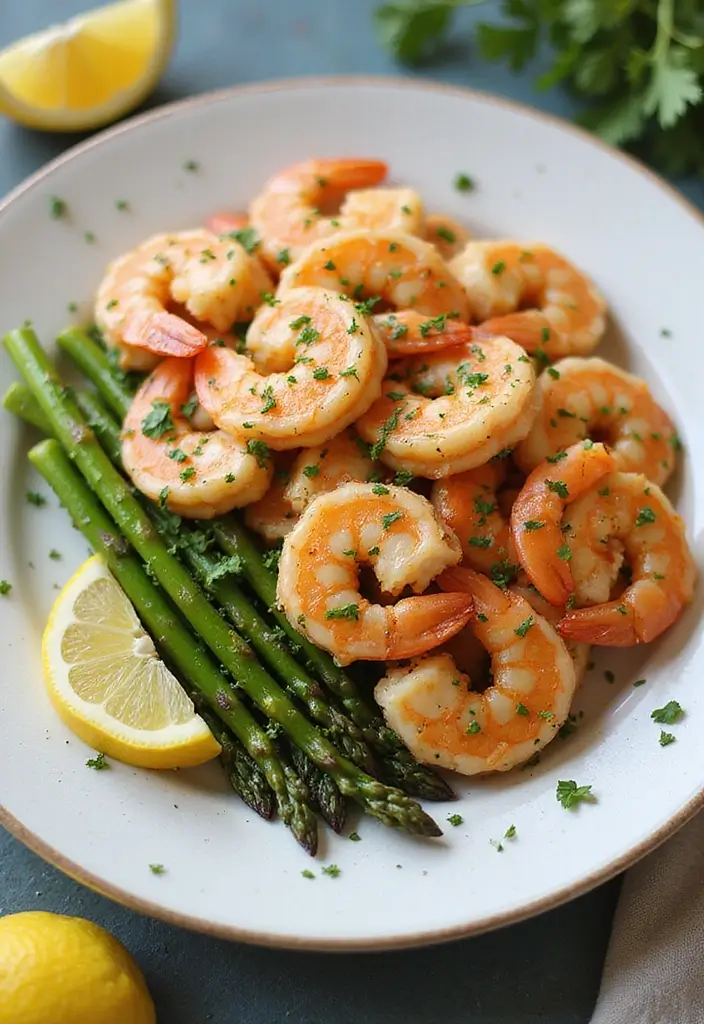
Savor the refreshing taste of Lemon Garlic Shrimp with Asparagus, a dish that’s quick to prepare yet elegant enough for a dinner party.
This one-pan meal is loaded with nutrients and comes together in just 20 minutes! It’s perfect for busy weeknights and light enough for summer evenings. To make your cooking experience easier and more enjoyable, consider using a non-stick skillet. This versatile cookware allows for easy cooking and cleanup, ensuring that your shrimp and asparagus don’t stick, while also promoting even cooking.
Recipe Overview:
– Servings: 4
– Prep Time: 5 minutes
– Cook Time: 15 minutes
– Total Time: 20 minutes
– Calories: Approximately 300 per serving
Nutrition Information:
– Protein: 25g
– Carbohydrates: 10g
– Fat: 15g
Ingredients:
– 1 lb shrimp, peeled and deveined
– 1 bunch asparagus, trimmed
– 4 cloves garlic, minced
– Juice of 1 lemon
– 2 tablespoons olive oil
– Salt and pepper to taste
Step-by-Step Instructions:
1. In a skillet, heat olive oil over medium heat. Using an OXO Good Grips garlic press makes mincing garlic effortless and quick, so you can enhance the dish’s flavor without the fuss.
2. Add garlic and sauté for 1 minute.
3. Add asparagus and cook for 2-3 minutes until tender.
4. Toss in shrimp, lemon juice, salt, and pepper. Cook until shrimp are pink, about 5 minutes.
5. Serve hot and enjoy the fresh flavors! Pair with a side salad for a complete meal.
To keep your olive oil handy and easy to pour, consider using an olive oil dispenser bottle. This not only adds a touch of elegance to your kitchen but also helps you control the amount of oil you use, ensuring your dish is just right.
FAQs: Can I use frozen shrimp? Yes, just ensure they are thawed before cooking.


13. Zucchini Noodles with Pesto
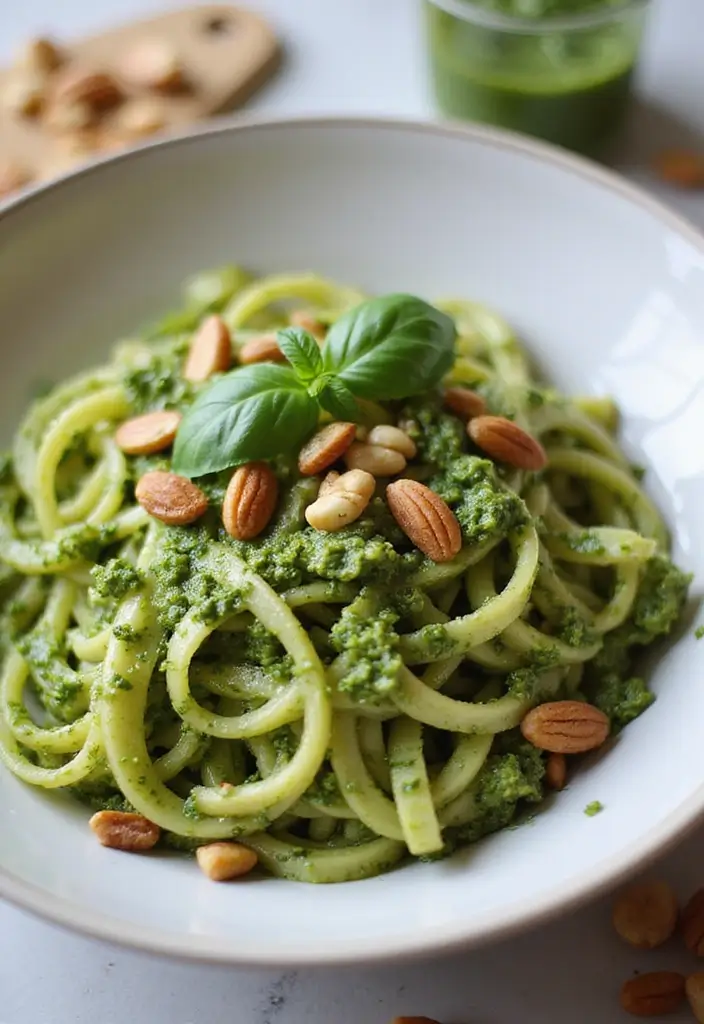
Light and refreshing, these Zucchini Noodles with Pesto are a fantastic alternative to traditional pasta.
Packed with flavor, this dish combines the fresh taste of zucchini with a vibrant homemade pesto that’s easy to whip up. Perfect for a quick lunch or dinner, it’s both gluten-free and Whole 30 compliant. To make the process even easier, consider using a spiralizer for effortlessly creating your zucchini noodles. It’s one of the best tools for low carb, gluten-free meals, allowing you to make delicious veggie pasta in just minutes.
Recipe Overview:
– Servings: 4
– Prep Time: 15 minutes
– Cook Time: 5 minutes
– Total Time: 20 minutes
– Calories: Approximately 150 per serving
Nutrition Information:
– Protein: 5g
– Carbohydrates: 8g
– Fat: 12g
Ingredients:
– 4 medium zucchinis, spiralized
– 1 cup fresh basil leaves
– 1/4 cup pine nuts
– 2 cloves garlic
– 1/4 cup olive oil
– Salt and pepper to taste
Step-by-Step Instructions:
1. In a food processor, blend basil, pine nuts, garlic, salt, and pepper until finely chopped. A reliable food processor makes this step a breeze, quickly chopping and mixing your ingredients for a smooth pesto.
2. Slowly drizzle in olive oil while blending to create a smooth pesto.
3. In a skillet, lightly sauté zucchini noodles for 2-3 minutes until just tender.
4. Toss in pesto until well-coated. Serve immediately.
You can add grilled chicken for extra protein.
FAQs: Can I prepare the pesto ahead of time? Yes, it stores well in the fridge for up to one week.
Swap traditional pasta for vibrant zucchini noodles and bring your meals to life! Whole 30 recipes like these not only taste amazing but also keep you feeling light and energized.

14. Creamy Avocado Dressing
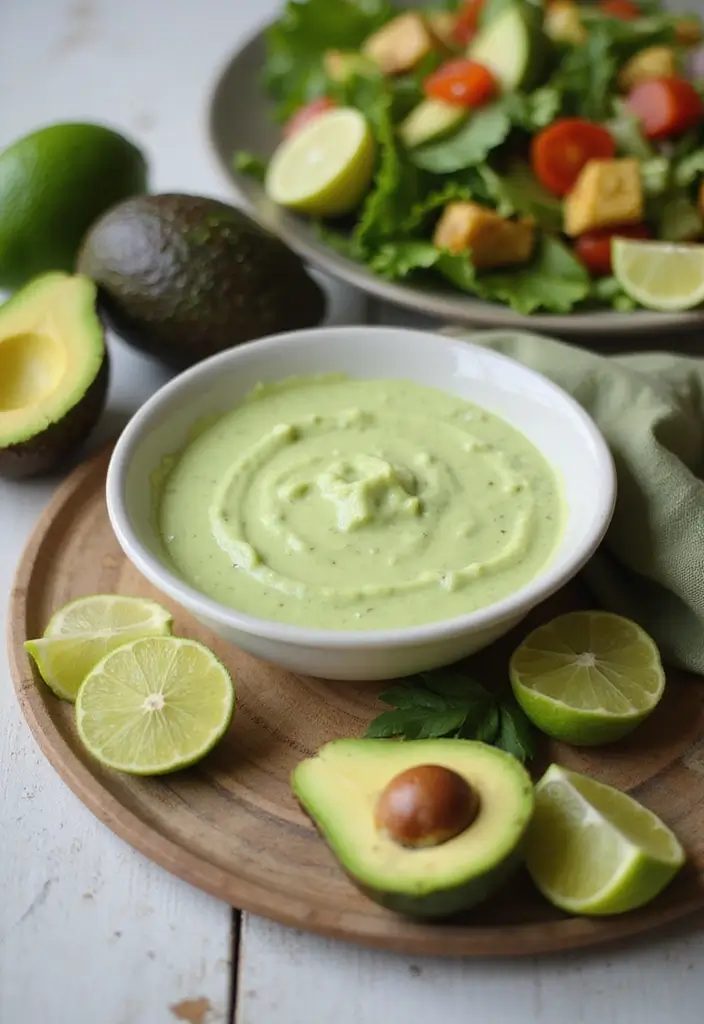
Brighten up your salads with this Creamy Avocado Dressing! This easy-to-make dressing is not only delicious but also packed with healthy fats, making it a great choice for your Whole 30 meals. It’s creamy, zesty, and can be used not just on salads but also as a dip for veggies or spread on sandwiches.
To prepare this recipe seamlessly, consider using high-quality ingredients. A great option is Pompeian smooth extra virgin olive oil, which is first cold-pressed and contains beneficial polyphenols. This olive oil enhances the flavor of your dressing while contributing healthy fats.
For easy preparation, an avocado slicer tool can be incredibly helpful. It simplifies the process of cutting and pitting your ripe avocado, ensuring you get every bit of that creamy goodness into your dressing.
Finally, to achieve that perfectly smooth and creamy texture, a reliable blender is essential. The Ninja professional blender is ideal for making this dressing. With its powerful blending capability, you can ensure all the ingredients are thoroughly mixed, providing you with a delightful dressing in no time.
Recipe Overview:
– Servings: 6
– Prep Time: 5 minutes
– Cook Time: 0 minutes
– Total Time: 5 minutes
– Calories: Approximately 100 per serving
Nutrition Information:
– Protein: 2g
– Carbohydrates: 5g
– Fat: 9g
Ingredients:
– 1 ripe avocado
– 1/4 cup olive oil
– Juice of 1 lime
– 1 clove garlic
– Salt and pepper to taste
Step-by-Step Instructions:
1. In a blender, combine avocado, olive oil, lime juice, garlic, salt, and pepper.
2. Blend until smooth and creamy.
3. Adjust seasoning as needed.
4. Serve immediately or refrigerate for later use.
Add a splash of water if you want a thinner consistency.
FAQs: How long can I store this dressing? It lasts for 2-3 days in the fridge.
Elevate your salads in just 5 minutes! This Creamy Avocado Dressing not only adds a zesty kick but also packs in healthy fats for your Whole 30 meals. You won’t just dress your greens; you’ll transform every bite!


15. Stuffed Bell Peppers
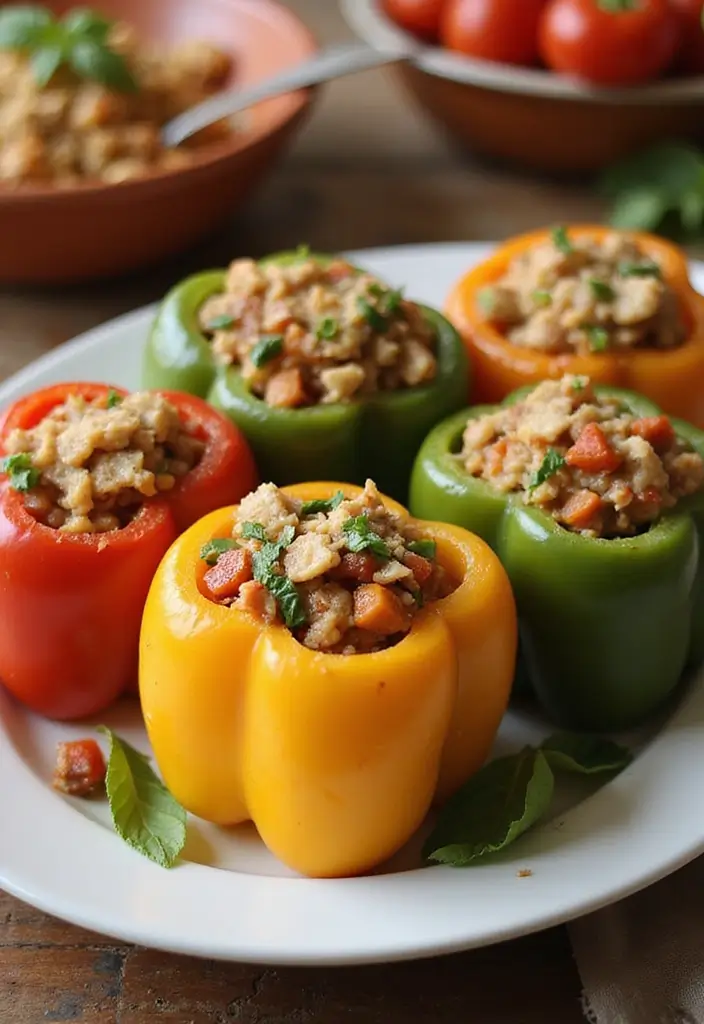
These Stuffed Bell Peppers are a colorful and nutritious meal that’s sure to satisfy! Filled with a hearty mixture of meat, veggies, and spices, they’re great for meal prep and can be customized to fit your family’s tastes. Plus, they’re a one-dish wonder, making cleanup a breeze!
To make your meal prep even easier, consider using meal prep containers. These 32oz plastic food prep containers are reusable, leakproof, and safe for the microwave, dishwasher, and freezer, making them perfect for storing your delicious stuffed peppers.
Recipe Overview:
– Servings: 4
– Prep Time: 15 minutes
– Cook Time: 30 minutes
– Total Time: 45 minutes
– Calories: Approximately 300 per serving
Nutrition Information:
– Protein: 25g
– Carbohydrates: 15g
– Fat: 15g
Ingredients:
– 4 bell peppers, halved and seeded
– 1 lb ground beef or turkey
– 1 cup cooked cauliflower rice
– 1 cup diced tomatoes
– 1 teaspoon Italian seasoning
– Salt and pepper to taste
To save on prep time, you can use cauliflower rice, which is a low-carb and healthy rice alternative. This ready-to-eat option is not only convenient but also compliant with Whole 30 guidelines, allowing you to focus on preparing the rest of your meal.
Step-by-Step Instructions:
1. Preheat oven to 375°F (190°C).
2. In a skillet, brown ground meat, then add tomatoes, cauliflower rice, Italian seasoning, salt, and pepper; mix well.
3. Stuff halved peppers with the mixture.
4. Place in a baking dish and cover with foil.
5. Bake for 25 minutes, then remove foil and bake for an additional 5 minutes.
6. Serve hot.
For the perfect flavor, don’t forget to include Italian seasoning in your stuffing mix. This blend will elevate your dish with its aromatic herbs and spices, ensuring every bite is packed with flavor. You can even top with a little compliant cheese if desired.
FAQs: Can I use other kinds of peppers? Absolutely! Feel free to experiment with different colors and flavors. Enjoy your cooking!


16. Grilled Vegetable Skewers
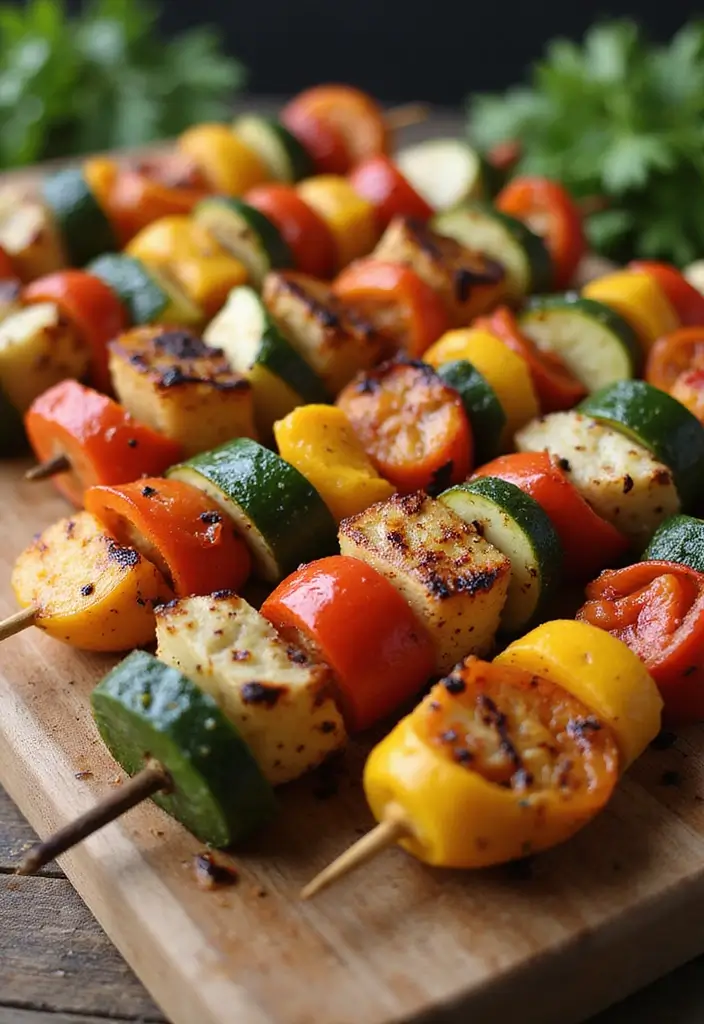
Get ready for grilling season with these Grilled Vegetable Skewers! A perfect side dish for any meal, these skewers are loaded with seasonal veggies, bringing vibrant colors and flavors together. They’re not only easy to prepare but are also a great way to sneak in those veggies for the kids!
To make your grilling experience even better, consider investing in some reusable metal skewers. Unlike wooden skewers, these won’t burn on the grill, ensuring your delicious veggies stay intact throughout the cooking process.
Recipe Overview:
– Servings: 4
– Prep Time: 15 minutes
– Cook Time: 10 minutes
– Total Time: 25 minutes
– Calories: Approximately 150 per serving
Nutrition Information:
– Protein: 3g
– Carbohydrates: 12g
– Fat: 9g
Ingredients:
– 1 zucchini, sliced
– 1 bell pepper, cut into chunks
– 1 onion, cut into chunks
– 1 cup cherry tomatoes
– 2 tablespoons olive oil
– Salt and pepper to taste
Step-by-Step Instructions:
1. Preheat grill to medium-high heat.
2. In a large bowl, toss vegetables with olive oil, salt, and pepper. For an elegant touch, use an olive oil dispenser bottle to control how much oil you add.
3. Thread onto skewers, alternating vegetables.
4. Grill for 8-10 minutes, turning occasionally, until tender and slightly charred.
5. Serve hot.
Soak wooden skewers in water for 30 minutes before grilling to prevent burning, but with reusable metal skewers, you won’t have to worry about that!
FAQs: Can I add protein to the skewers? Absolutely! Chicken or shrimp would work great.


17. Apple Cinnamon Chia Pudding

Start your day with a wholesome breakfast that’s also a treat! This Apple Cinnamon Chia Pudding is a creamy, satisfying way to enjoy chia seeds, bringing the warm flavors of apple and cinnamon together.
It’s a great make-ahead option that’s perfect for busy mornings, and the kids will love it too!
Recipe Overview:
– Servings: 4
– Prep Time: 5 minutes
– Cook Time: 0 minutes
– Total Time: 5 minutes (plus chilling)
– Calories: Approximately 200 per serving
Nutrition Information:
– Protein: 5g
– Carbohydrates: 20g
– Fat: 10g
Ingredients:
– 1/2 cup chia seeds (consider using BetterBody Foods Organic Chia Seeds for their excellent nutritional profile, including omega-3s and fiber)
– 2 cups almond milk (try Almond Breeze Dairy Free Almondmilk for a creamy and unsweetened base)
– 1 apple, diced
– 1 teaspoon cinnamon
– 2 tablespoons maple syrup (optional; adding Butternut Mountain Farm Pure Vermont Maple Syrup will enhance the sweetness with its rich, robust flavor)
Step-by-Step Instructions:
1. In a bowl, mix chia seeds, almond milk, diced apple, cinnamon, and maple syrup.
2. Stir well and let sit for 5 minutes.
3. Stir again to prevent clumps.
4. Cover and refrigerate for at least 2 hours or overnight.
5. Serve chilled, topped with more diced apple if desired.
You can add nuts or seeds for extra crunch.
FAQs: How long does chia pudding last? It’s best consumed within 3-5 days.
18. Turkey Lettuce Wraps
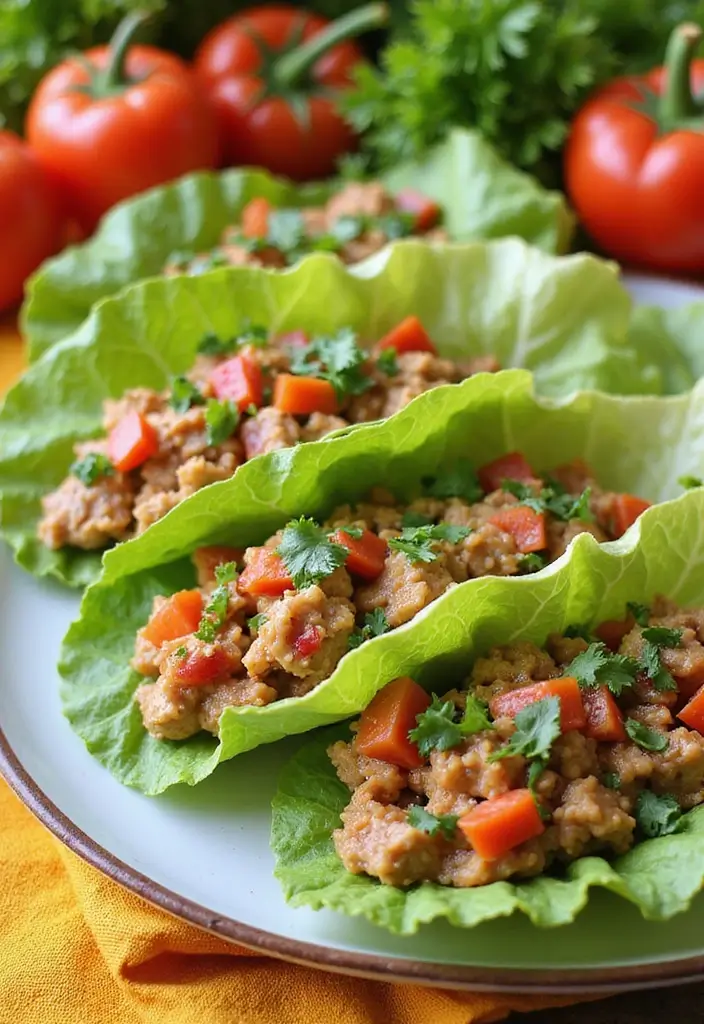
These Turkey Lettuce Wraps are a fun and healthy twist on traditional wraps! Filled with seasoned ground turkey and fresh veggies, they’re a fantastic low-carb option that’s perfect for any meal of the day. Quick to make and easy to customize, these wraps are ideal for busy families.
For the ground turkey, consider using Perdue Fresh Ground Turkey Breast, 1 lb. It’s lean and packed with protein, making it a great choice for this recipe.
Recipe Overview:
– Servings: 4
– Prep Time: 10 minutes
– Cook Time: 10 minutes
– Total Time: 20 minutes
– Calories: Approximately 250 per serving
Nutrition Information:
– Protein: 30g
– Carbohydrates: 8g
– Fat: 15g
Ingredients:
– 1 lb ground turkey
– 1 tablespoon olive oil
– 1 tablespoon soy sauce (or coconut aminos)
– 1 cup veggies (carrots, bell peppers, cucumber, diced)
– Butter lettuce leaves for wrapping
Step-by-Step Instructions:
1. In a skillet, heat olive oil over medium heat.
2. Cook ground turkey until browned.
3. Stir in soy sauce and veggies, cooking for another 2-3 minutes.
4. Serve by scooping the mixture into lettuce leaves and wrapping them up!
You can add sesame seeds for extra flavor.
FAQs: Can I use chicken instead of turkey? Yes, chicken works great too!


19. Cucumber Salad with Dill
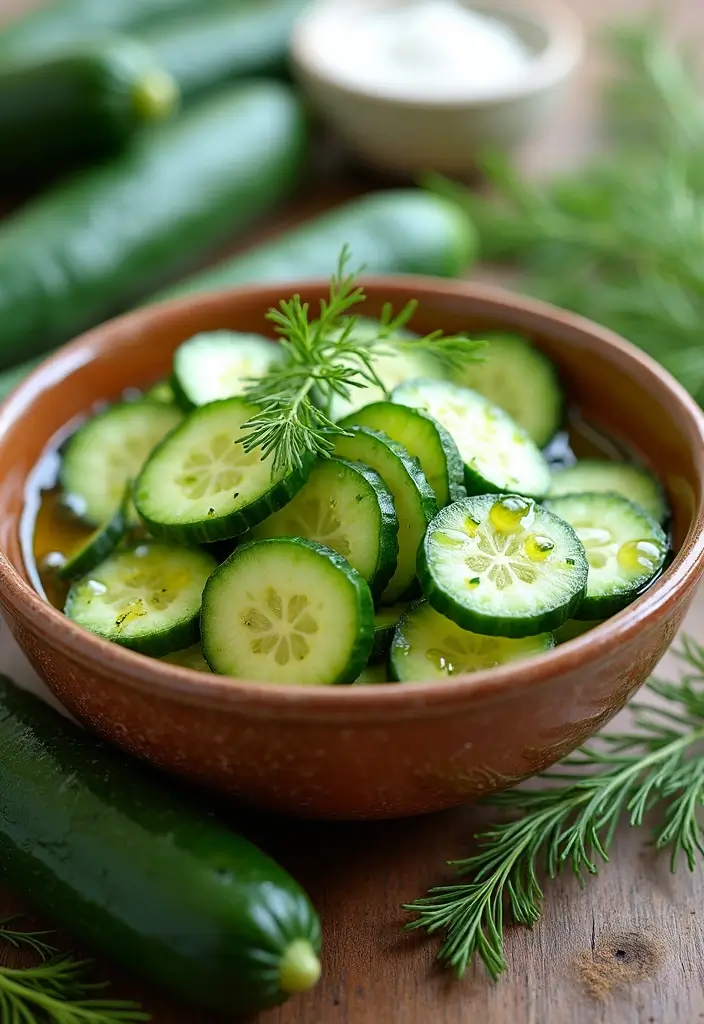
This refreshing cucumber salad with dill is a delightful side dish that pairs perfectly with grilled meats or seafood. Light and zesty, this salad is easy to prepare and a fantastic way to include fresh vegetables in your meals. It’s a great way to cool down on hot days!
For this recipe, using high-quality ingredients can elevate your dish. One such product is Pompeian Smooth Extra Virgin Olive Oil. This olive oil is first cold-pressed and contains polyphenols, providing not only rich flavor but also healthy fats that are compliant with Whole 30 diets.
Recipe Overview:
– Servings: 4
– Prep Time: 10 minutes
– Cook Time: 0 minutes
– Total Time: 10 minutes
– Calories: Approximately 80 per serving
Nutrition Information:
– Protein: 2g
– Carbohydrates: 6g
– Fat: 6g
Ingredients:
– 2 large cucumbers, sliced
– 1/4 cup olive oil
– Juice of 1 lemon
– 1 tablespoon fresh dill, chopped
– Salt and pepper to taste
Step-by-Step Instructions:
1. In a large bowl, combine sliced cucumbers, olive oil, lemon juice, dill, salt, and pepper.
2. Toss to combine well.
3. Let sit for 10 minutes before serving to allow the flavors to meld.
Chill for a few hours for even better flavor.
FAQs: How long does this salad last? It’s best eaten fresh but can be stored for up to 2 days.
20. Coconut Curry Chicken
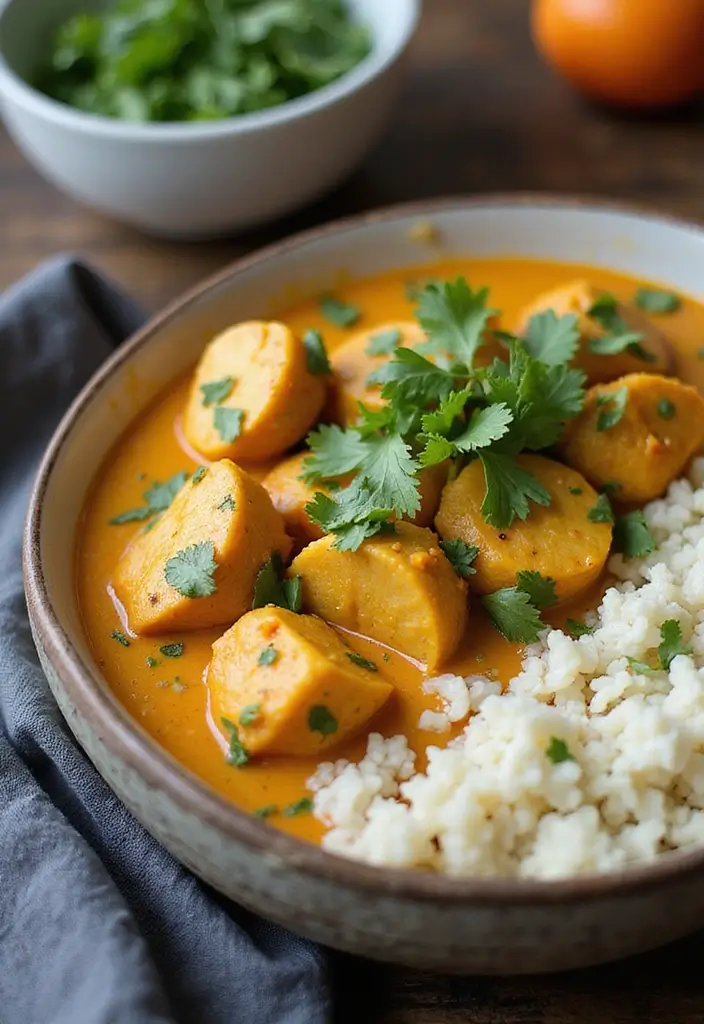
Delight in the rich flavors of Coconut Curry Chicken, a dish that brings the warmth of spices right to your dinner table. Tender chicken pieces simmered in a creamy coconut sauce with aromatic spices create a meal that feels luxurious yet is incredibly easy to prepare. This dish pairs beautifully with cauliflower rice for a complete meal, offering a deliciously healthy alternative to traditional grains.
For the perfect spice blend, consider using curry powder. Its vibrant flavors will elevate your Coconut Curry Chicken, ensuring each bite is packed with authentic taste. Additionally, incorporating high-quality coconut milk adds a creamy richness that perfectly complements the spices, making the sauce both indulgent and dairy-free.
Here’s the recipe overview:
– Servings: 4
– Prep Time: 15 minutes
– Cook Time: 30 minutes
– Total Time: 45 minutes
– Calories: Approximately 400 per serving
Nutrition Information:
– Protein: 30g
– Carbohydrates: 12g
– Fat: 25g
Ingredients:
– 1 lb chicken breast, cubed
– 1 can coconut milk
– 2 tablespoons curry powder
– 1 onion, diced
– 3 cloves garlic, minced
– Salt and pepper to taste
Step-by-Step Instructions:
1. In a skillet, heat oil over medium heat. Sauté onion and garlic until translucent.
2. Add chicken pieces and cook until browned on all sides.
3. Stir in curry powder and cook for another minute, then add coconut milk.
4. Let simmer for 20-25 minutes until chicken is cooked through and sauce thickens.
5. Season with salt and serve.
Feel free to add vegetables like spinach or bell pepper for extra nutrition. If you’re looking for a vegetarian option, tofu or chickpeas would work well as a substitute for chicken.


21. Chocolate Chia Seed Pudding
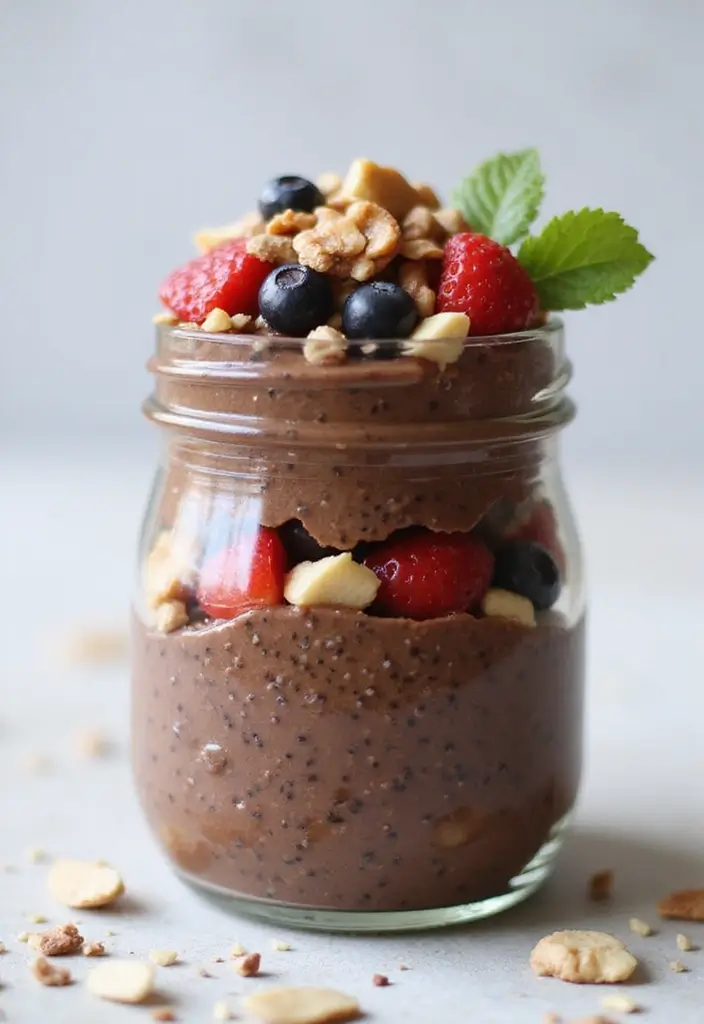
Indulge your sweet tooth with this delightful Chocolate Chia Seed Pudding!
Rich, creamy, and chocolaty, this dessert is not just a treat but also a healthy option, packed with omega-3 fatty acids and fiber. Perfect for a quick dessert or snack, it can be prepared in advance for convenience.
For the base of this pudding, you’ll want to use high-quality chia seeds. I recommend BetterBody Foods Organic Chia Seeds, which are packed with omega-3s and are a good source of fiber.
Recipe Overview:
– Servings: 4
– Prep Time: 5 minutes
– Cook Time: 0 minutes
– Total Time: 5 minutes (plus chilling)
– Calories: Approximately 180 per serving
Nutrition Information:
– Protein: 4g
– Carbohydrates: 15g
– Fat: 10g
Ingredients:
– 1/2 cup chia seeds
– 2 cups almond milk
– 1/4 cup cocoa powder
– 2 tablespoons maple syrup (optional)
– 1 teaspoon vanilla extract
For the almond milk, you can choose Dairy Free Almondmilk Unsweetened Original. It’s a nutritious, low-calorie liquid that adds creaminess to the pudding without the added sugars found in conventional dairy.
For that rich chocolate flavor, don’t forget to add unsweetened cocoa powder. It’s Fair Trade Certified, ensuring you’re choosing a product with ethical sourcing while keeping your dessert compliant and delicious.
Step-by-Step Instructions:
1. In a bowl, whisk together chia seeds, almond milk, cocoa powder, maple syrup, and vanilla.
2. Let sit for 5 minutes and then stir again.
3. Cover and refrigerate for at least 2 hours or overnight.
4. Serve chilled, topped with fruit or nuts if desired.
For extra richness, use coconut milk instead.
FAQs: Can I make this ahead of time? Yes, it’s perfect for meal prep!

Conclusion

Embarking on a Whole 30 journey doesn’t mean sacrificing flavor or enjoyment.
These clean, Paleo-inspired recipes are designed to fit seamlessly into busy family life while nourishing your body and satisfying your cravings.
As you explore these compliant meals, remember that food should not only be good for you but also bring joy to your table. Happy cooking!
Note: We aim to provide accurate product links, but some may occasionally expire or become unavailable. If this happens, please search directly on Amazon for the product or a suitable alternative.
This post contains Amazon affiliate links, meaning I may earn a small commission if you purchase through my links, at no extra cost to you.
Frequently Asked Questions
What is the Whole 30 diet, and how does it work?
The Whole 30 diet is a short-term program designed to help reset your eating habits by eliminating certain food groups for 30 days. This means no sugar, grains, dairy, or legumes. After the 30 days, you slowly reintroduce these foods to identify any sensitivities. It’s a fantastic way to jumpstart clean eating and develop a better relationship with food!
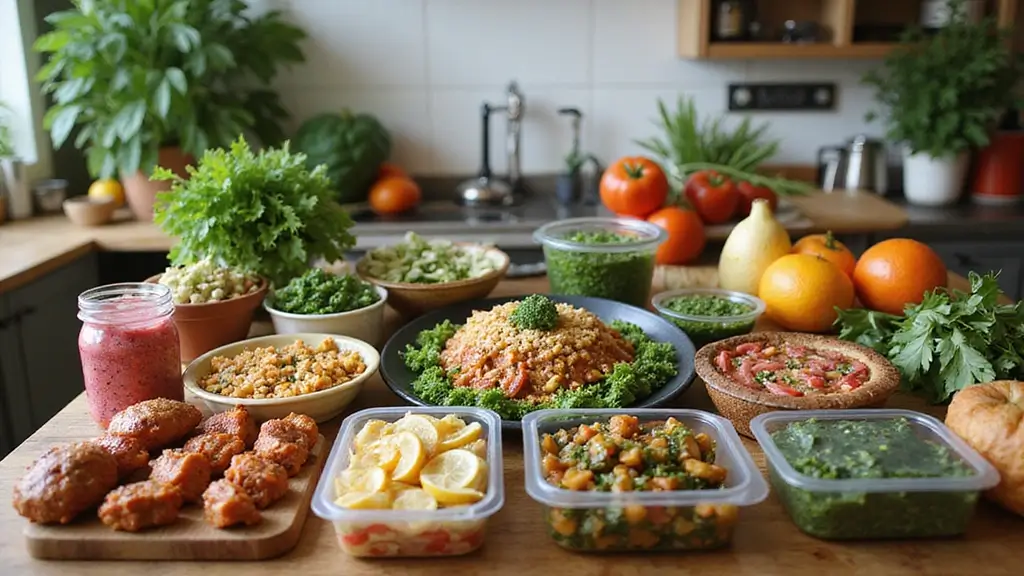
Are the recipes in this article suitable for busy families?
Absolutely! The recipes highlighted in this article are specifically designed for busy families. They are quick to prepare, use simple ingredients, and can often be made in bulk for easy meal prep. This way, you can enjoy healthy, Whole 30 compliant meals without spending hours in the kitchen!
Can I modify these Whole 30 recipes for my personal taste?
Definitely! One of the best things about Whole 30 recipes is their versatility. Feel free to substitute ingredients based on your preferences or what you have on hand. For instance, if you prefer chicken over shrimp or want to add more veggies to a dish, go for it! Just ensure that any substitutions remain compliant with the Whole 30 guidelines.
How can I ensure my meal prep stays compliant with Whole 30?
To keep your meal prep compliant with Whole 30, focus on whole, unprocessed foods. Stick to lean proteins, lots of vegetables, and healthy fats. Always check labels for hidden sugars or non-compliant ingredients. Planning your meals for the week can also help you stay on track and avoid the temptation of non-compliant foods!
What are some easy snacks for the Whole 30 diet?
Snacking can be tricky on Whole 30, but there are plenty of delicious options! Consider spicy roasted chickpeas, fresh fruit, or raw veggies with compliant dips like guacamole or homemade avocado dressing. You can also prepare almond flour pancakes or chocolate chia seed pudding for a sweet treat that fits within the guidelines!