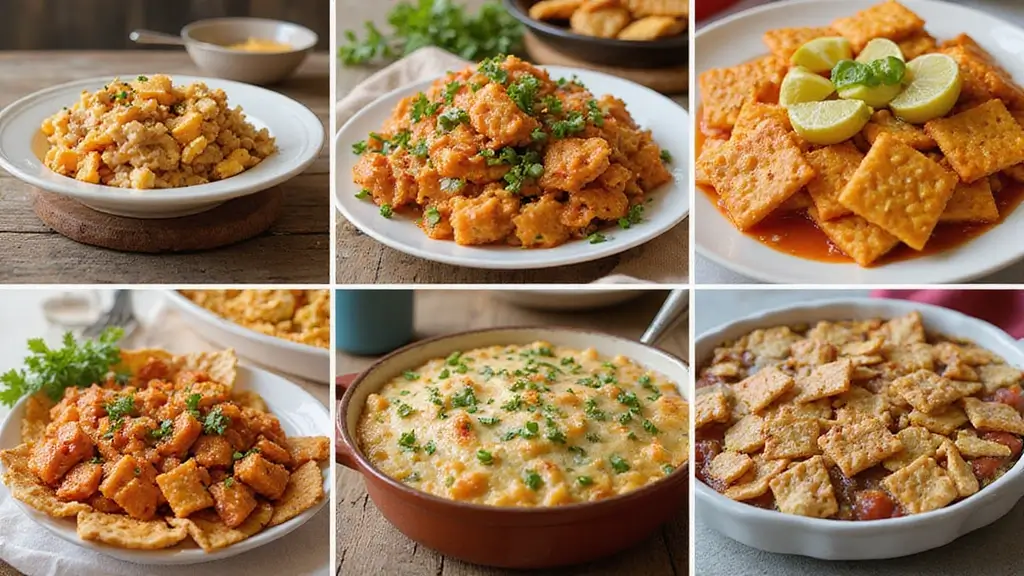
Crunchy Chex Mix is the quintessential party snack that brings people together in a delightful crunch.
With its perfect blend of savory, sweet, and salty flavors, it appeals to guests of all ages.
I fondly remember making this mix during family gatherings, where the air would be filled with laughter and the aroma of baking spices.
Whether it’s game day, a holiday celebration, or just a cozy movie night, this snack mix is always a crowd-pleaser that disappears in minutes.
The History and Cultural Significance
• Crunchy Chex Mix Recipes trace their origins to the 1950s, where they were popularized by the Chex brand as a quick and easy snack.
• The dish evolved over decades as more ingredients and flavors were introduced, eventually becoming a staple at parties and gatherings.
• In American culture, this mix traditionally appears at sports events and holiday celebrations, symbolizing togetherness and fun.
• While many variations exist across different households, the authentic version maintains its crunchy texture and flavor balance that sets it apart from imitations.


Recipe Overview
Nutritional Information (per serving)


Ingredients


Essential Equipment Guide
Baking Sheet: A good-quality baking sheet is essential for even heat distribution during baking, ensuring that the mix toasts evenly. Look for a heavy-duty sheet with a non-stick surface to prevent sticking and make cleanup easier.
Mixing Bowl: A large mixing bowl is important for combining all ingredients without spilling. Choose one that’s sturdy and easy to handle, preferably with a non-slip base for stability.
Spatula: A silicone spatula is ideal for mixing the ingredients together thoroughly and scraping down the sides of the bowl. Opt for one that is heat-resistant if you’re planning to work with warm ingredients.
Preparation Methods
Mixing Ingredients: This technique involves thoroughly combining all base ingredients in a large bowl. It ensures that each component is evenly distributed throughout the mixture. When mixing, use a gentle folding motion to avoid crushing the cereals or popcorn.
Coating with Sauce: Drizzling the melted butter and seasoning mixture over the dry ingredients is crucial for flavor adherence. Use a spatula to toss the mix gently, ensuring all pieces are coated without breaking them. This step enhances the flavor profile and adds to the crunchiness.
Baking: Baking the mix allows it to become crispy and toasty. Spread the mixture evenly on a baking sheet, and bake at a low temperature to ensure even cooking. Stir the mix halfway through to promote uniform browning.


Step 1: Preheat the Oven
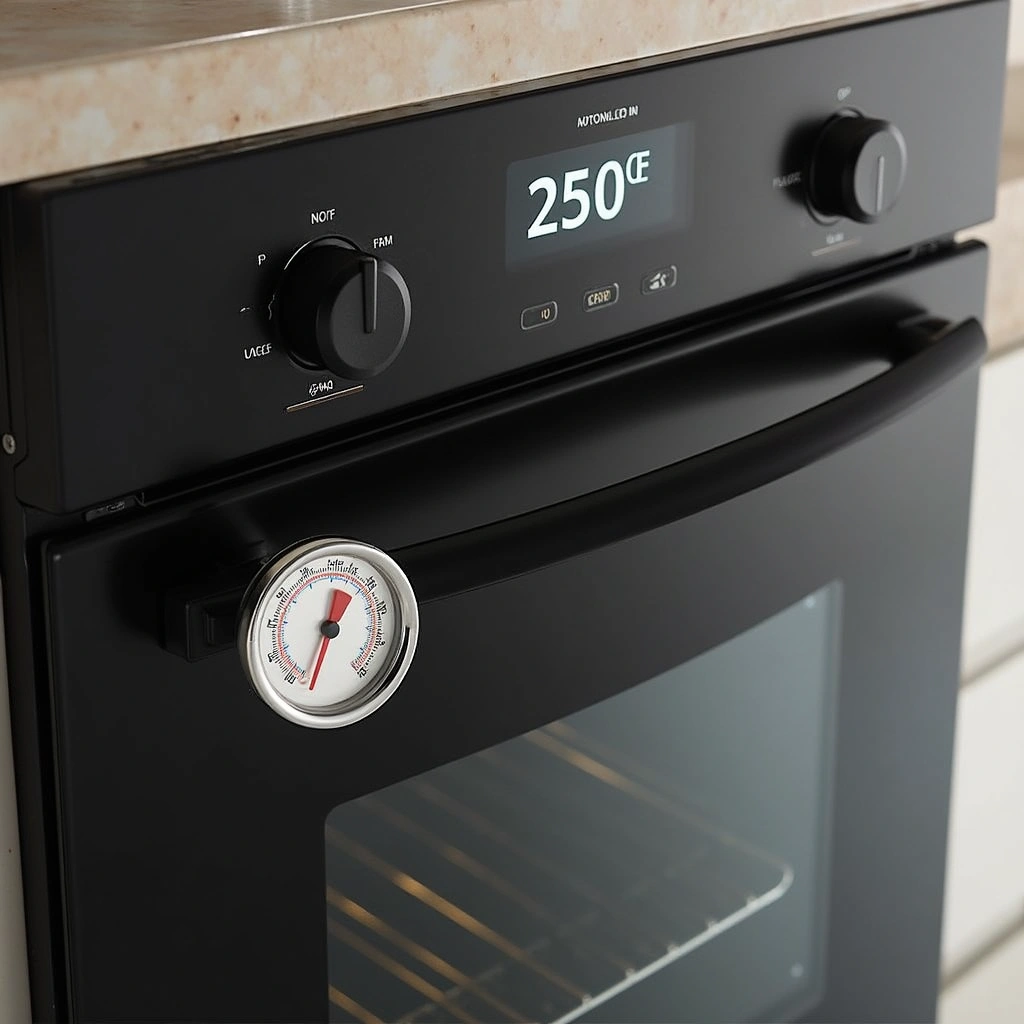
Begin by preheating your oven to 250°F.
This low temperature is essential for slowly toasting the mix without burning.
Ensure your oven is fully preheated before placing the baking sheet inside.
Use an oven thermometer for accuracy if you’re unsure of your oven’s calibration.


Step 2: Prepare Baking Sheet
Line a baking sheet with parchment paper for easy cleanup.
This will also prevent the Chex Mix from sticking during the baking process.
Make sure the parchment paper covers the entire sheet without wrinkles.
This step helps achieve an even bake and keeps the mix intact when serving.


Step 3: Mix Dry Ingredients

In a large mixing bowl, combine the Chex cereal, pretzels, mixed nuts, and popcorn.
Use a spatula to gently fold the ingredients together until evenly mixed.
Take care not to crush the cereals or popcorn during this process.
This ensures that every bite has a variety of textures and flavors.
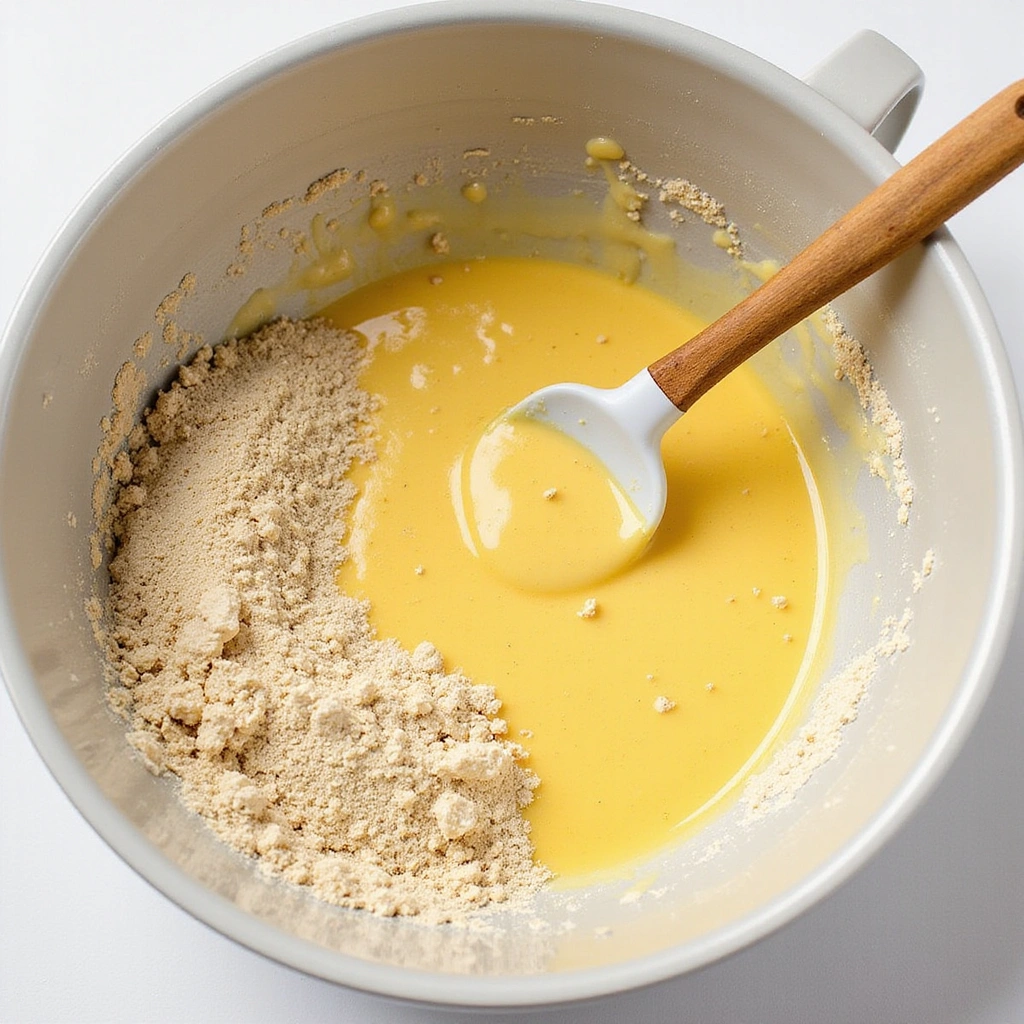
Step 4: Melt Butter and Combine Sauce Ingredients
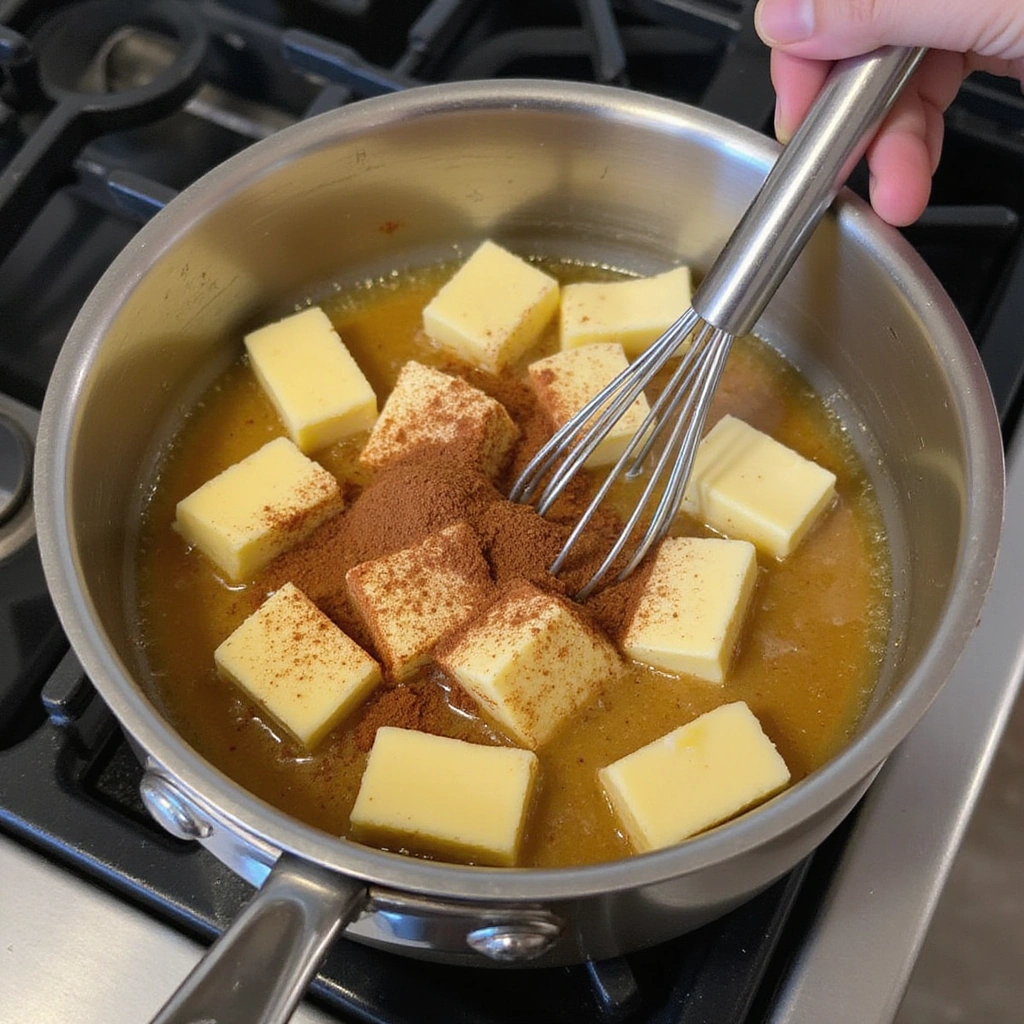
In a small saucepan, melt the butter over low heat.
Once melted, remove from heat and stir in Worcestershire sauce, garlic powder, onion powder, seasoned salt, smoked paprika, and black pepper.
Mix until all ingredients are well combined and smooth.
This sauce will coat the dry ingredients, enhancing their flavor.
Step 5: Coat the Dry Ingredients
Drizzle the melted butter mixture over the dry ingredients in the bowl.
Use a spatula to gently toss the mix, ensuring that all pieces are coated evenly.
Take your time with this step to avoid breaking the cereal or popcorn.
This coating is what gives the Chex Mix its distinctive flavor and crunch.
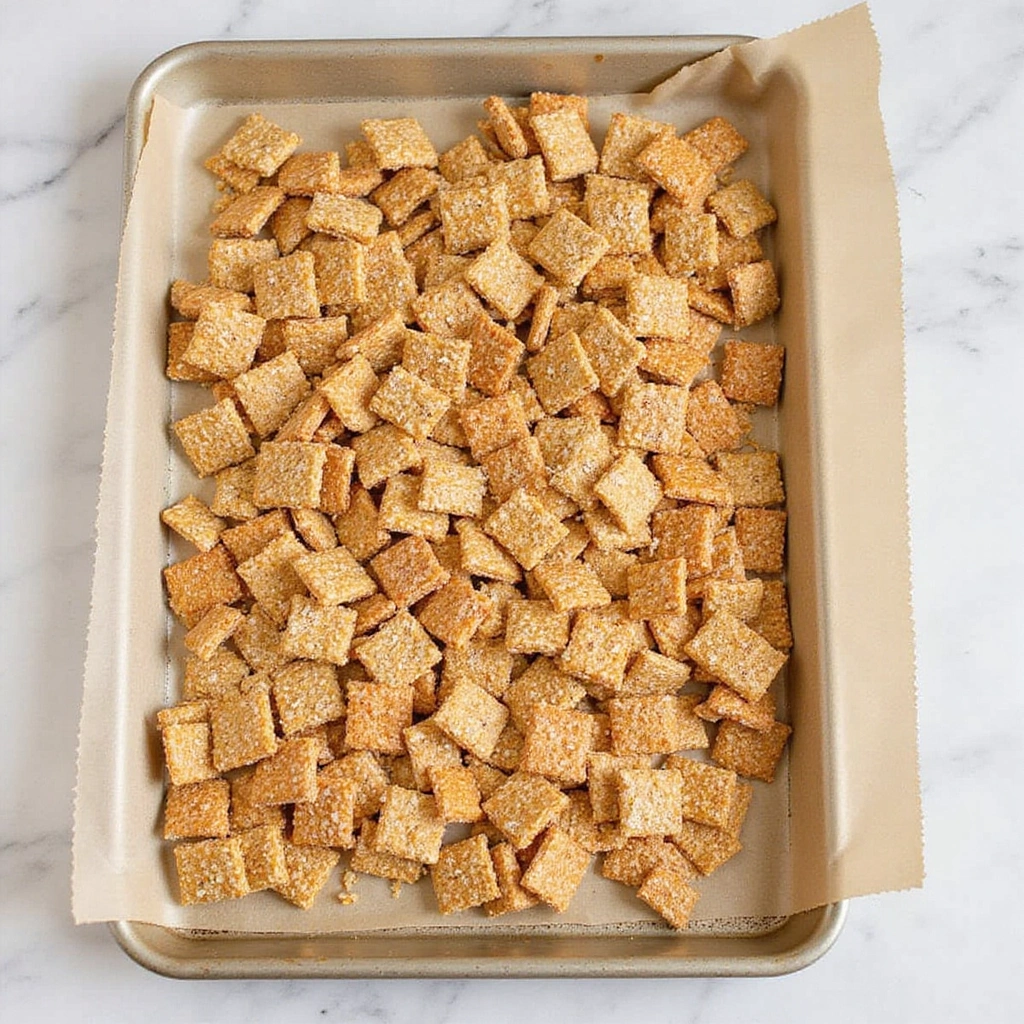
Step 6: Spread on Baking Sheet

Transfer the coated mix onto the prepared baking sheet.
Spread it out evenly to ensure consistent baking.
Leave some space between the pieces to allow for even airflow.
This helps every piece become crispy during the baking process.
Step 7: Bake the Chex Mix
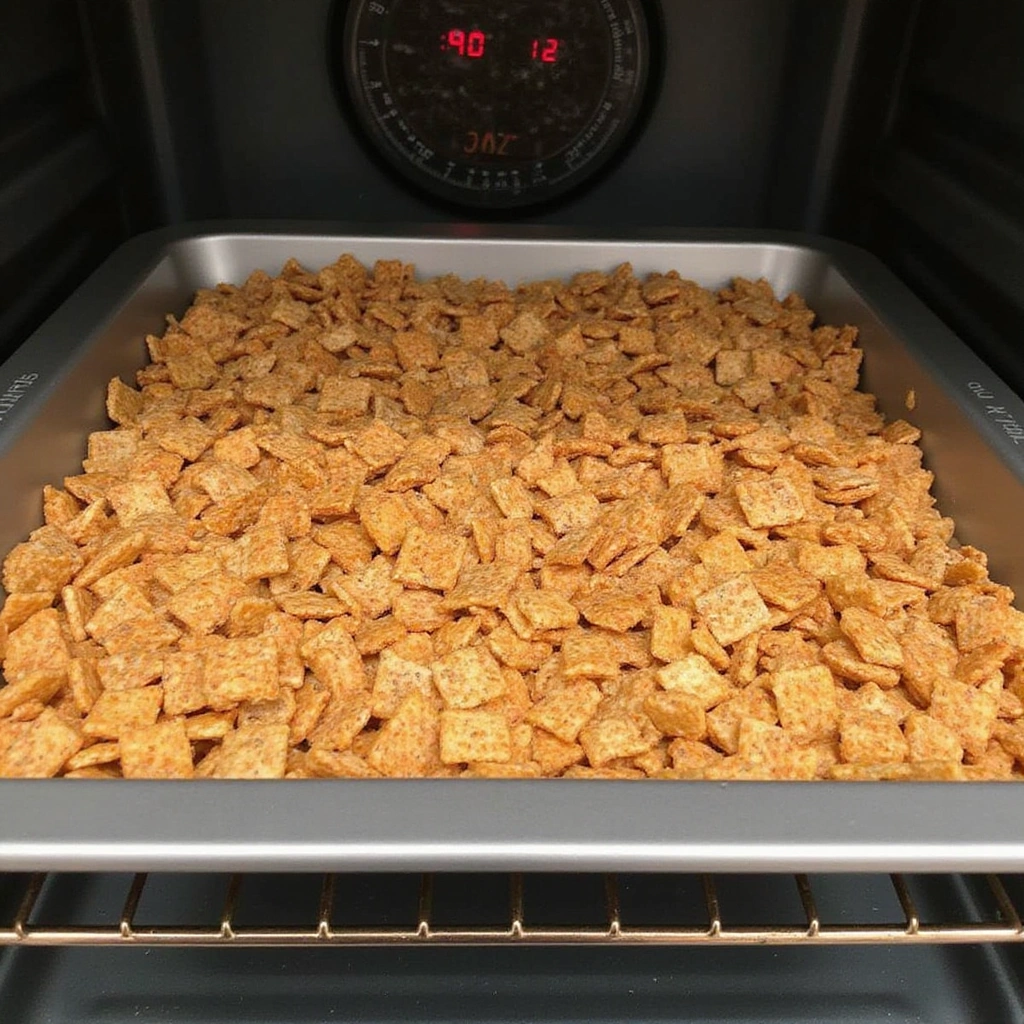
Place the baking sheet in the preheated oven and bake for 30 minutes.
Stir the mixture every 10 minutes to promote even browning.
Look for a golden color and a crispy texture as indicators of doneness.
This baking time allows the flavors to meld and the mix to become crunchy.


Step 8: Cool and Store

Remove the baking sheet from the oven and let the Chex Mix cool completely.
This cooling time allows the mix to firm up and become even crunchier.
Once cooled, store the mix in an airtight container to maintain its freshness.
Proper storage is key to preserving the texture and flavor until serving.
Critical Timing and Temperature Guide
Baking Time: Bake for 30 minutes at 250°F. Look for a golden hue and crispy texture. Avoid overbaking, as this can lead to burnt flavors.
Cooling Time: Allow the mix to cool for at least 15 minutes before storing. This ensures maximum crunchiness and flavor retention.
Storage Time: Store in an airtight container for up to 2 weeks. Check for moisture, which can soften the mix.
Pro Tips for Crunchy Chex Mix Recipes
• Ingredient Selection: Use fresh nuts and high-quality Chex cereal for the best flavor and texture. The freshness directly impacts the mix’s overall taste.
• Preparation Secret: Letting the mixture sit for a few minutes after tossing with the sauce allows flavors to penetrate better before baking.
• Temperature Management: Ensure your oven is fully preheated before baking to achieve an even cook and prevent sogginess.
• Texture Enhancement: For an extra crunchy mix, consider adding a bit of cornmeal to the dry ingredients.
• Flavor Layering: Experiment with different spices, like cayenne pepper or nutritional yeast, to create unique flavor profiles.
• Make-Ahead Strategies: Prepare the mix a day in advance, and store it in an airtight container to let the flavors meld.
• Restaurant-Quality Finishing Touches: Consider garnishing with fresh herbs or a sprinkle of sea salt just before serving for an elevated look.
• Equipment Optimization: Use a silicone baking mat for easy release and cleanup, ensuring a perfectly baked mix.


Troubleshooting Common Issues
• Mix is Soggy: This can happen if the sauce is too wet or if there’s not enough baking time. Ensure you’re using the correct amount of butter and spices, and extend the baking time slightly if needed.
• Burnt Flavor: If the mix tastes burnt, it may have been baked at too high a temperature or for too long. Always stick to the recommended temperature and check for doneness periodically.
• Uneven Flavor: If some pieces taste bland, ensure that you are thoroughly coating all ingredients with the sauce. Toss the mix well before baking, and consider adding more seasoning.
• Too Salty: If the mix is overly salty, reduce the amount of seasoned salt next time and balance it with more nuts or popcorn.
• Texture Too Dense: This may occur if the mix is packed too tightly on the baking sheet. Spread it out evenly and allow for airflow between pieces for better texture.


Variations and Regional Differences
• Sweet Chex Mix: This variation includes ingredients like chocolate chips, pretzel M&Ms, and caramel, providing a sweet counterpoint to the traditional savory mix.
• Spicy Chex Mix: Add cayenne pepper, chili powder, or hot sauce to the butter mixture for a kick of heat that complements the crunch.
• Nut-Free Version: Substitute nuts with additional pretzels or seeds for a nut-free alternative that still delivers on crunch and flavor.
• Modern Interpretations: Incorporate trendy ingredients like quinoa puffs or gluten-free cereals to cater to dietary preferences while keeping the essence of the classic mix.


Food Science Behind the Recipe
• Maillard Reaction: This is the chemical reaction that occurs when proteins and sugars in the mix are exposed to heat, resulting in the golden color and distinct flavors. Understanding this helps you achieve that perfect crunch.
• Texture Transformation: The combination of fats from butter and the dry ingredients creates a crispy texture when baked. The right ratio of fat to dry ingredients is crucial for achieving this.
• Flavor Development: The process of toasting the mix not only enhances its flavor but also creates new flavor compounds through the Maillard reaction, deepening the overall taste profile.


Frequently Asked Questions
What’s the most common mistake people make when preparing Crunchy Chex Mix? The most common mistake is overbaking, which leads to a burnt flavor. Keep an eye on the mix and stir it regularly to prevent this.
Can I prepare components of this dish in advance? Yes, you can prepare the dry ingredients ahead of time and store them in an airtight container. Mix the sauce just before baking for the freshest flavor.
How do I adapt this recipe for dietary restrictions? For gluten-free options, use gluten-free Chex cereal and ensure all other ingredients are certified gluten-free.
What’s the best way to store and reheat leftovers? Store in an airtight container at room temperature for up to two weeks. There’s no need to reheat; it’s best enjoyed at room temperature.
Can I freeze this dish? Freezing is not recommended, as it can alter the texture of the mix. It’s best enjoyed fresh or at room temperature.
What wine or beverages pair best with this dish? Light beers, crisp white wines like Sauvignon Blanc, or even a sweet iced tea complement the flavors well.
How can I scale this recipe up for a crowd? Simply double or triple the ingredients, using larger baking sheets to accommodate the increased volume. Adjust baking time as needed for larger batches.
What side dishes complement this recipe best? Serve with a fresh veggie platter or a cheese board to balance the crunchiness of the Chex Mix.
How do professional chefs elevate this dish for restaurant service? Chefs might incorporate gourmet ingredients like truffle oil or artisan spices to enhance the flavor and presentation.
Serving and Presentation Guide
• Traditional Presentation: Serve in a large, colorful bowl surrounded by festive decorations, showcasing the mix’s vibrant colors and textures.
• Modern Plating Ideas: Use small individual cups or mason jars for a trendy presentation that’s perfect for parties, making it easy for guests to grab and go.
• Accompaniment Suggestions: Pair with dips like hummus or ranch dressing for a fun twist, enhancing the snacking experience.
• Special Occasion Presentation: For holidays, consider adding seasonal touches like cranberries or nuts, and serve in a decorative bowl to elevate the festive feel.
Conclusion
I hope you’re inspired to create your own batch of Crunchy Chex Mix for your next gathering.
It’s a versatile snack that can be customized to suit any palate.
Enjoy the process of making it as much as the delicious results that follow.